How to Seal Holes to Keep Mice Out
Sealing holes is one of the most important parts of long-term mouse prevention. A mouse-proof repair needs to close the actual opening, resist chewing or displacement, and preserve the building system around it.
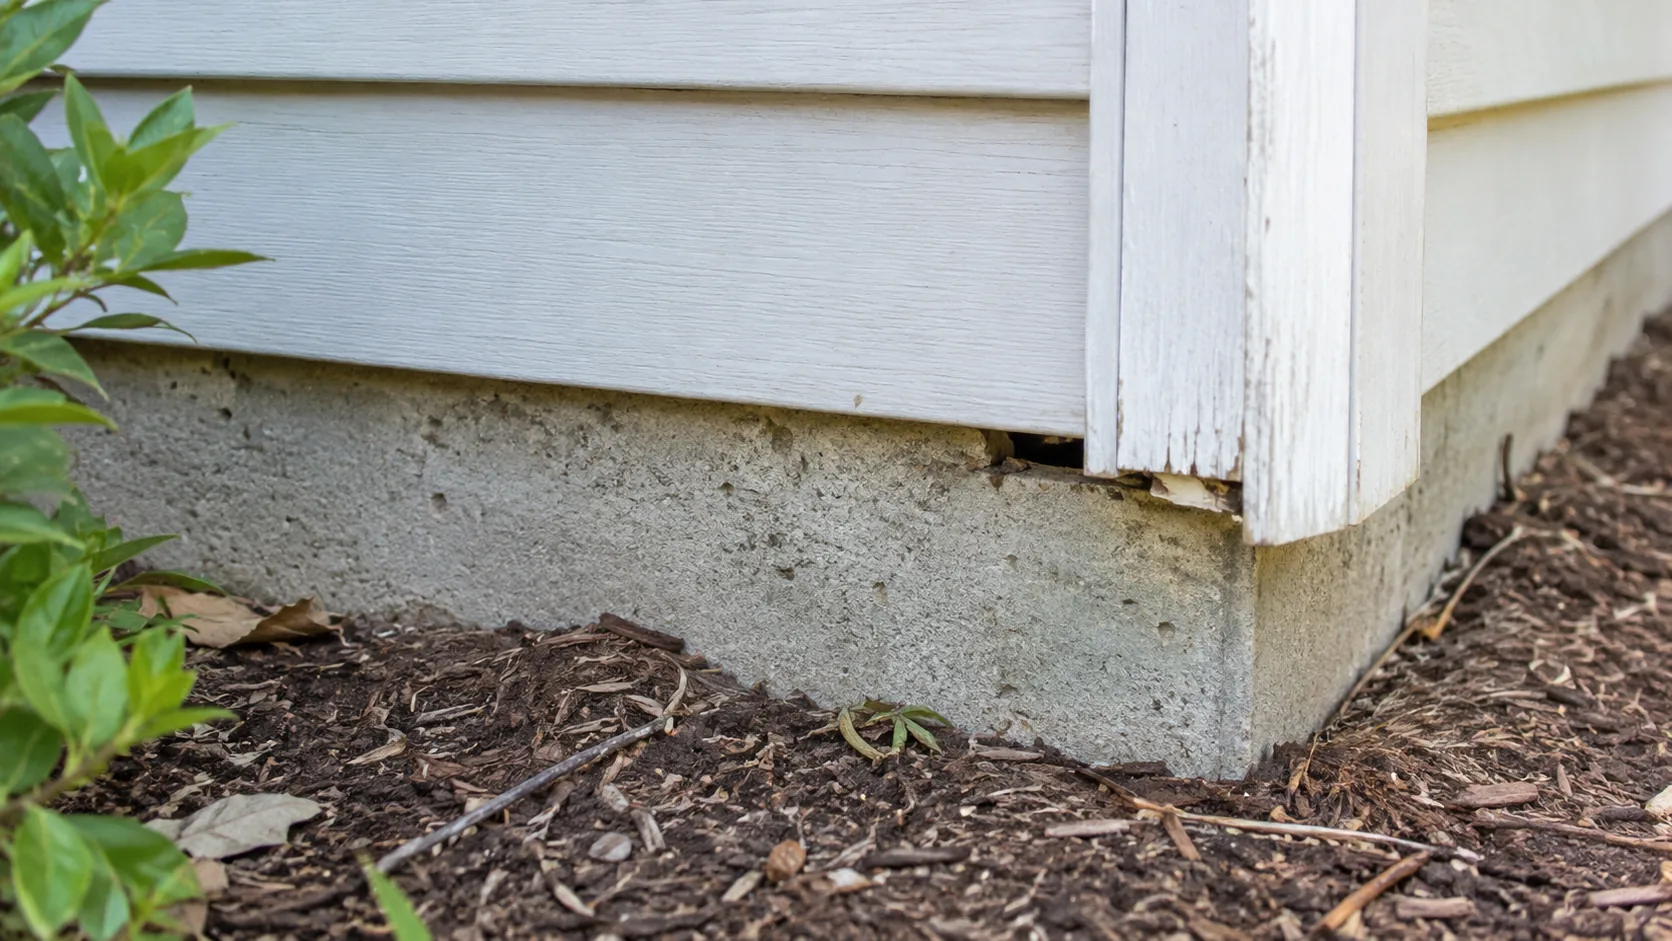
Sealing holes is one of the most important parts of long-term mouse prevention.
But a mouse-proof repair is not simply:
- finding a gap
- filling it with whatever material is nearby
- assuming the problem is solved
The repair needs to do three things:
- close the actual structural opening
- resist chewing or displacement
- preserve the building system around it
That last point matters.
A bad repair can create:
- trapped moisture
- blocked ventilation
- damaged wiring
- obstructed exhaust
- plumbing problems
- door-operation problems
If mice are already active indoors, timing matters too.
Do not automatically seal the only active route while mice may still be inside.
The safest long-term approach is to identify the route, coordinate trapping or removal when needed, then complete a durable repair.
This guide explains how to seal common mouse holes around a house without creating new building problems.
How Small a Hole Should You Seal for Mice?
For practical inspection and exclusion, treat openings around 1/4 inch — about 6 millimeters — and larger as potentially mouse-accessible.
That is a rule of thumb, not a guarantee.
Whether a mouse can use a particular opening depends on:
- the mouse’s size
- the shape of the gap
- the narrowest usable dimension
- whether the edge flexes
- whether the material can be gnawed
- whether the opening widens behind the surface
See How Small a Hole Can a Mouse Fit Through? for the full size and geometry explanation.
Should You Seal Every Hole You Find?
No.
A good exclusion job prioritizes openings that:
- lead into a usable cavity
- are large enough to matter
- show fresh mouse evidence nearby
- connect to a room where activity is occurring
Fresh evidence can include:
- mouse droppings
- small tracks
- gnaw marks
- repeated sightings
A clean cosmetic crack that does not penetrate the building envelope is different from an active entry gap.
See Mouse Entry Points: Where to Inspect Your Home.
Should You Seal Mouse Holes While Mice Are Still Inside?
Sometimes final sealing should wait.
If mice are actively using the house, sealing the only route too early can cause them to:
- move deeper into walls
- enter another room
- gnaw a new opening
- die in an inaccessible void
When fresh indoor activity is present, use monitored trapping or professional control as appropriate, then coordinate final exclusion.
See Mouse Traps: Types, Placement & How to Use Them and How to Get Rid of Mice.
What Is the Best Material for Sealing Mouse Holes?
There is no single best material for every opening.
The correct repair depends on:
- surface
- gap size
- exposure to weather
- building movement
- nearby utilities
- drainage requirements
- whether the area needs future service access
Common durable repair components can include:
- metal mesh
- metal flashing
- mortar
- compatible patching material
- rodent-resistant backing
- suitable exterior sealant
- repaired weatherstripping
- replacement screening
The repair should match the construction rather than relying on one material everywhere.
Is Expanding Foam Enough to Stop Mice?
Soft foam alone should not be treated as universally mouse-proof.
Mice can gnaw many soft materials.
Foam may still be useful in some building details when it is part of a properly designed repair, but exposed foam by itself is often a weak final barrier.
A stronger approach is usually to combine the repair with a durable backing or surface appropriate to the opening.
Do not spray foam into:
- electrical boxes
- active HVAC equipment
- dryer ducts
- drains
- moving door hardware
- combustion-air openings
Is Steel Wool Good for Mouse Holes?
Loose steel wool is often discussed as a mouse barrier, but it has limitations.
It can:
- rust
- loosen
- be pulled out
- be unsuitable around electrical components
- look unfinished outdoors
Do not pack steel wool into electrical equipment or against exposed energized wiring.
For a durable repair, use a building-appropriate rodent-resistant barrier and a compatible finish rather than relying on loose material alone.
What About Metal Mesh?
Metal mesh can be useful as backing or screening when:
- the opening is larger than a sealant-only repair
- the mesh is properly secured
- the mesh does not block required airflow or drainage
- exposed sharp edges are avoided
Choose a repair detail suited to:
- the opening
- the surface
- weather exposure
- service needs
A loose scrap of mesh wedged into a gap is not the same as a durable exclusion repair.
What About Copper Mesh?
Copper mesh is sometimes used as a backing material because it resists rust better than plain steel wool.
But the same principles still apply.
The material should be:
- mechanically stable
- compatible with the surrounding building surface
- protected from being pulled out
- kept away from electrical components where conductive material would be inappropriate
The goal is a secure repair, not a stuffed cavity.
How to Seal a Small Gap in Wood or Trim
For a small nonfunctional gap in wood or exterior trim:
- confirm the gap actually leads into a usable cavity
- remove loose or deteriorated material
- repair damaged wood if needed
- add durable backing if the gap is too large for sealant alone
- finish with a compatible exterior-grade repair material
Do not simply smear sealant over rotten or loose trim.
If the underlying wood is deteriorated, the structural material may need repair first.
How to Seal Mouse Holes in a Foundation
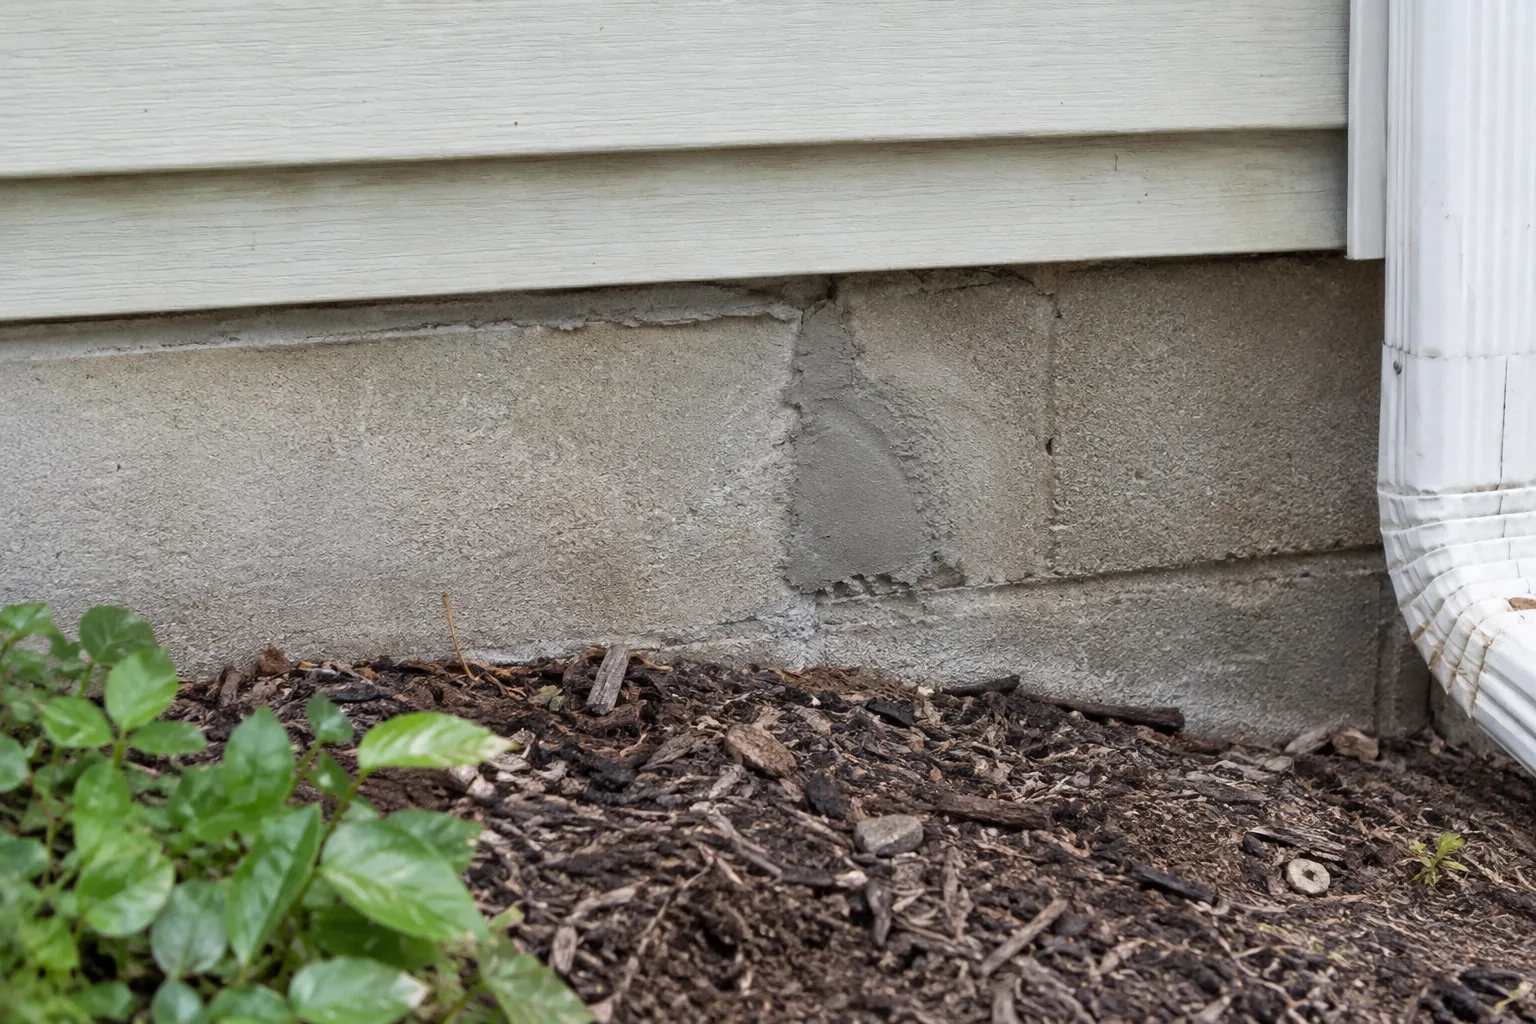
Foundation repairs depend on the material.
Possible surfaces include:
- poured concrete
- concrete block
- brick
- stone
- mortar joints
Small nonstructural defects may be repaired with an appropriate masonry-compatible product.
Larger or deteriorated openings may require:
- mortar repair
- masonry patching
- metal backing
- professional repair
Do not cover a crack if:
- water is actively entering
- the foundation appears displaced
- the opening may indicate structural movement
Those conditions need proper evaluation.
How to Seal Mouse Holes Around Pipes
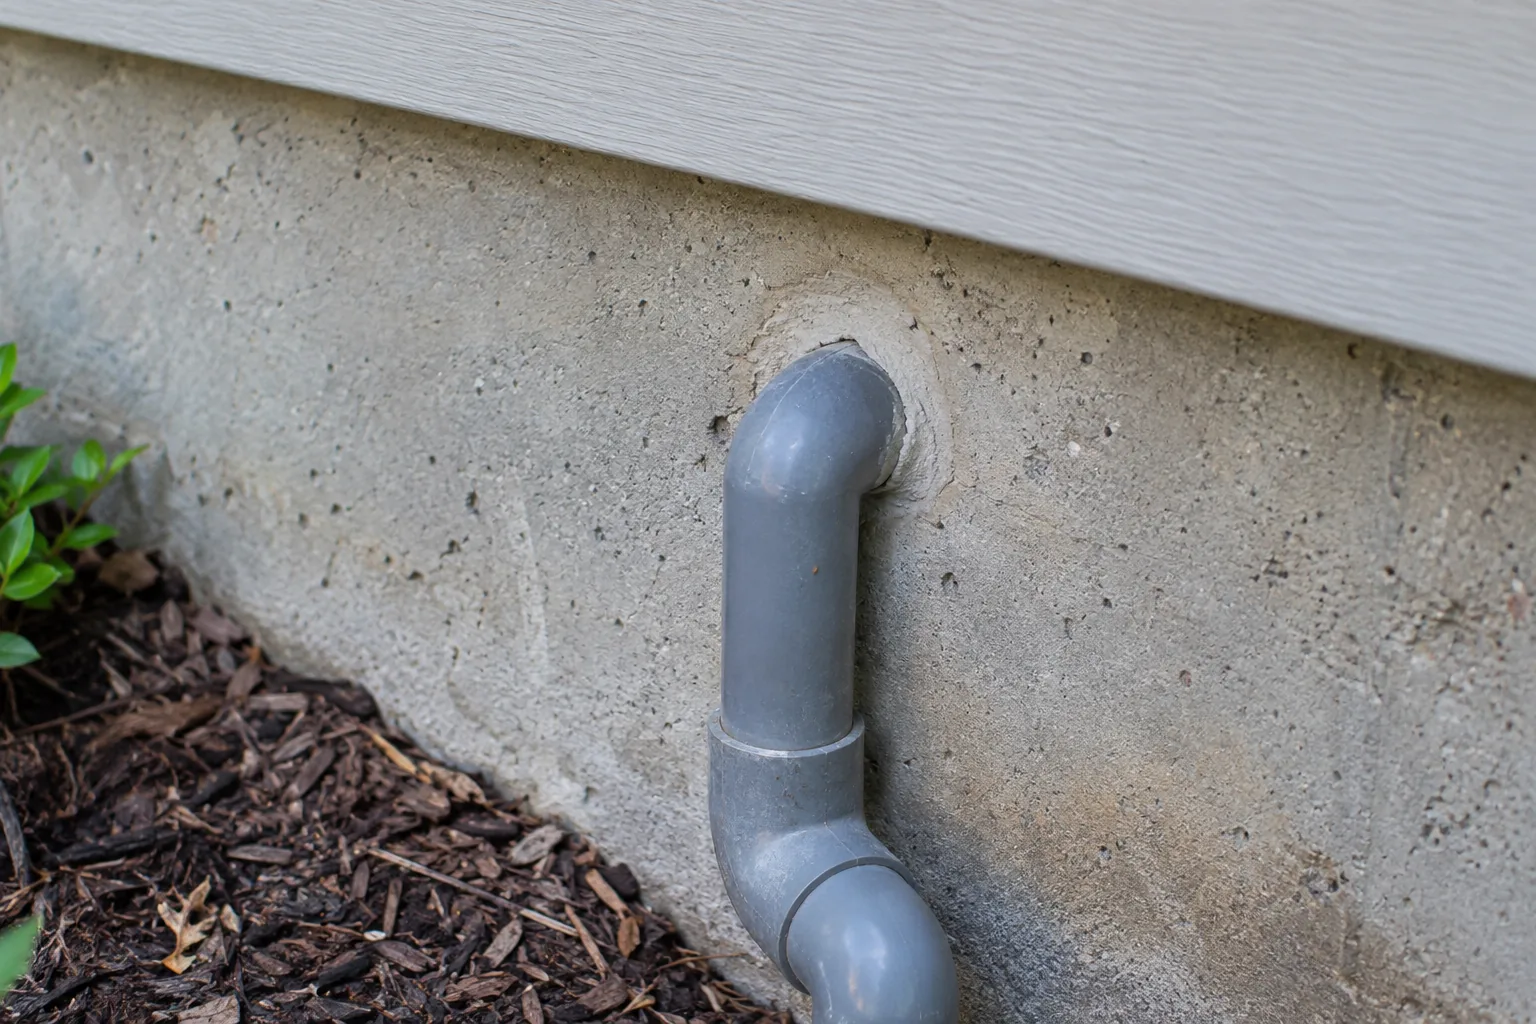
Pipes commonly leave extra space around wall or floor penetrations.
Examples include:
- water lines
- drain pipes
- refrigerator lines
- dishwasher lines
- condensate lines
To repair the surrounding gap:
- keep the pipe accessible
- preserve normal movement where required
- do not cover shutoff valves
- do not hide leaks
- do not interfere with drainage
The repair should close the structural opening around the pipe, not immobilize the plumbing system.
How to Seal Mouse Holes Around Electrical Conduit or Cables
Electrical and communication lines can leave oversized penetrations.
The safe target is the building gap around the line.
Do not:
- open energized electrical equipment
- pack conductive material into electrical boxes
- cover service panels
- bury junction boxes
- disturb exposed wiring
If the penetration is part of an electrical assembly or wiring is damaged, use a qualified electrician.
How to Seal Gaps Around HVAC Line Sets
HVAC line sets may pass through walls with excess space around:
- refrigerant tubing
- insulation
- condensate tubing
- control wiring
A repair should preserve:
- line insulation
- condensate drainage
- service access
- normal pipe movement
Do not compress lines or block a condensate path.
If the area involves active HVAC equipment, leave equipment service work to a qualified technician.
Can You Seal Around a Dryer Vent?
You can repair the structural gap around the exterior vent housing.
Do not block or reduce the dryer exhaust opening itself.
Do not install improvised material inside the duct where lint can collect.
Dryer exhaust must remain clear and functional.
The target is the unnecessary perimeter gap around the vent housing.
Can You Seal Around Bathroom or Kitchen Exhaust Vents?
Repair the building perimeter around the vent if there is an unnecessary gap.
Do not block:
- bathroom exhaust
- kitchen exhaust
- mechanical ventilation
The repair should protect the wall opening while leaving the intended airflow path functional.
How to Seal Mouse Holes Around Exterior Doors
Exterior doors commonly develop gaps around:
- lower corners
- thresholds
- sweeps
- weatherstripping
- damaged trim
For door gaps, repair the moving door system rather than filling the opening with rigid material.
Possible fixes include:
- replacing worn weatherstripping
- repairing the threshold
- replacing a damaged sweep
- repairing lower trim
The door should still open, close, latch, and provide safe egress.
How to Seal Mouse Gaps Under a Garage Door
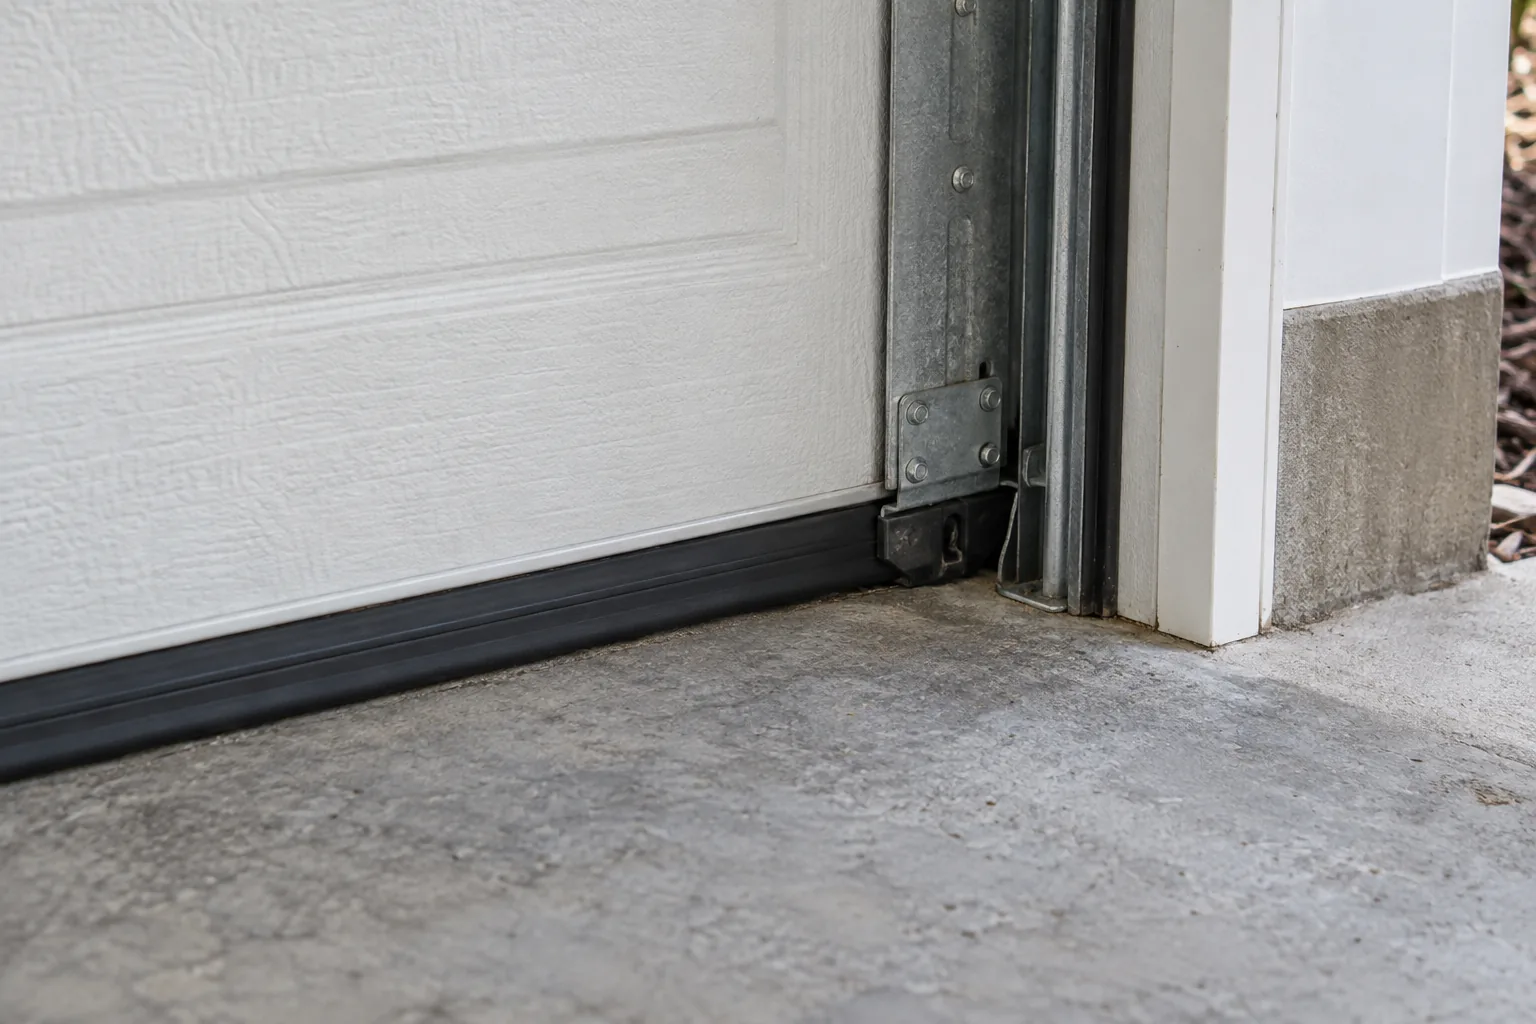
Garage-door lower corners often need:
- repaired bottom seal
- repaired side seal
- corrected threshold transition
- repair of damaged jamb material
Do not:
- block the door track
- interfere with the safety system
- jam rigid material into moving hardware
A properly aligned door and intact weatherstripping are usually more durable than an improvised filler.
See Mice in the Garage: Entry Points, Nests & Control.
How to Seal Gaps Around Siding
Siding can create confusing openings.
Before sealing, determine whether the gap is:
- an unnecessary construction defect
- a service penetration
- part of a designed drainage path
- part of a siding system that needs movement
Do not seal every visible siding edge.
Repair only openings that provide actual rodent access while preserving the wall system’s moisture-management function.
Do Not Block Weep Holes
Some brick and siding systems include intentional openings for drainage.
Do not permanently fill a designed weep hole just because it looks mouse-sized.
Blocking drainage can trap moisture inside the wall.
If pest resistance is needed, the solution must preserve the drainage function.
How to Seal Crawl-Space Vent Gaps
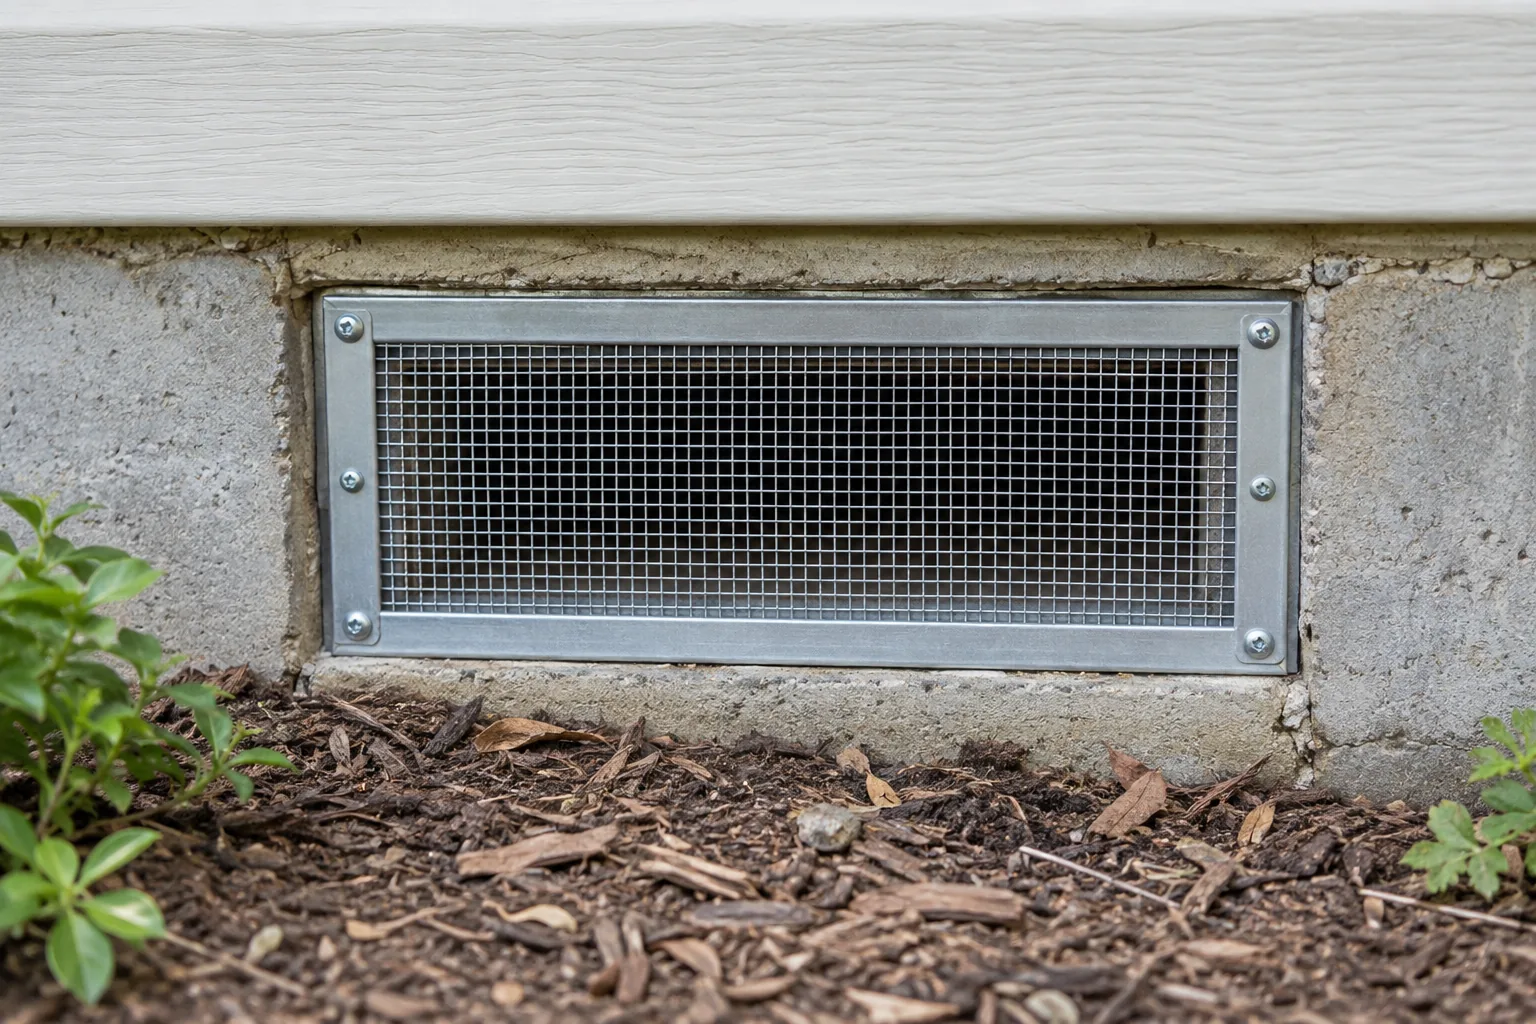
Crawl-space vents may allow mice through:
- torn screening
- loose frames
- damaged corners
- perimeter gaps
Repair the protective screen or frame.
Do not block the entire vent if the building relies on that opening for ventilation.
See Mice in the Crawl Space: Signs & Removal.
How to Repair a Crawl-Space Access Door
A damaged access door may need:
- frame repair
- new weatherstripping
- latch repair
- lower-edge repair
The door should remain:
- secure
- functional
- accessible for future inspection
Do not permanently seal a required access opening shut.
How to Seal Basement Window Gaps
Check around:
- frames
- trim
- window wells
- deteriorated sealant
Repair materials should match the surface.
If the window is used for:
- ventilation
- emergency egress
- required access
do not alter its function.
See Mice in the Basement: Why They’re There & What to Do.
How to Seal Soffit and Fascia Gaps
Upper-level gaps can provide access to attic spaces.
Common repairs may involve:
- replacing loose soffit panels
- repairing fascia
- replacing damaged vent screening
- repairing trim transitions
Do not work from an unstable ladder or unsafe roof position.
If the gap is difficult to reach safely, use a roofing or pest-control professional.
How to Repair Attic Vent Screens
Attic vents should remain open to airflow.
If screening is:
- torn
- missing
- loose
repair or replace the protective screen.
Do not seal the vent shut.
See Mice in the Attic: Signs, Damage & Removal.
How to Seal Interior Gaps Under Sinks
Interior pipe penetrations under sinks can connect to:
- wall cavities
- plumbing chases
- neighboring rooms
Before sealing:
- check for leaks
- preserve shutoff access
- keep pipes serviceable
- avoid electrical components
If the opening is connected to a shared building system in an apartment, permanent repair may require management or maintenance.
How to Seal Gaps Behind Cabinets
Cabinet gaps may be:
- cosmetic
- structural
- connected to a wall cavity
If mice are active behind cabinets, identify the real route before closing a visible front gap.
Otherwise, mice may remain active behind the repair.
How to Seal Gaps Behind a Refrigerator
The refrigerator area can hide:
- pipe openings
- water-line penetrations
- baseboard gaps
- wall-floor openings
Do not move a heavy refrigerator alone if it cannot be moved safely.
Do not:
- pinch the power cord
- damage the water line
- seal around hot or moving appliance components
See Mice Behind the Refrigerator: Why They Hide There.
How to Seal Baseboard Gaps
A small baseboard gap may be:
- cosmetic
- connected to a wall cavity
- hiding a larger opening behind the trim
If fresh droppings or tracks appear at one section, inspect that area more closely.
Do not simply caulk every visible baseboard seam if the actual entry route is behind the wall or around a utility.
What Materials Work for Different Mouse Holes?
A simple guide:
Masonry
Possible repair components:
- mortar
- masonry-compatible patch
- metal backing for larger defects
Wood and Trim
Possible repair components:
- replacement wood
- metal backing
- suitable sealant or exterior patch
Utility Penetrations
Possible repair components:
- secure rodent-resistant backing
- compatible sealant
- appropriate collar or trim detail
Vents
Possible repair components:
- repaired screen
- secured metal mesh
- repaired frame
Doors and Garage Doors
Possible repair components:
- weatherstripping
- sweeps
- thresholds
- seal replacement
No single material is appropriate for every location.
What Should You Never Seal Shut?
Do not block:
- dryer exhaust
- HVAC supply vents
- HVAC return grilles
- combustion-air openings
- attic ventilation
- required crawl-space ventilation
- intentional weep holes
- drainage paths
- plumbing drains
- electrical service access
- moving door hardware
- required access panels
Mouse exclusion should improve the building envelope without disabling building systems.
Should You Use Caulk Alone?
Sealant can work well for small stable gaps when:
- the substrate is sound
- the opening is small
- the area is not highly exposed to chewing
- the material is appropriate for the surface
For larger or vulnerable openings, sealant alone may not provide enough physical resistance.
Use backing or repair the underlying building defect when necessary.
Should You Use Cement or Mortar?
Masonry-compatible repair materials can work well for:
- foundation defects
- mortar gaps
- masonry penetrations
Do not use rigid masonry material where the building detail requires:
- movement
- flexible flashing
- service access
Match the repair to the construction.
How to Know Whether the Repair Is Strong Enough
A good repair should be:
- mechanically secure
- compatible with the surface
- resistant to chewing
- weather-appropriate
- serviceable
- neat enough to inspect later
If the material can be pulled out easily by hand, it is unlikely to be a durable final repair.
How to Check a Repair After Sealing
Reinspect the area for:
- fresh droppings
- new gnawing
- displaced material
- damaged screening
- opened weatherstripping
- new tracks
The absence of fresh evidence over time is more meaningful than one quiet night.
What If Mice Start Using Another Hole?
That may mean:
- another entry point was already present
- the original route was closed while mice remained inside
- the repair shifted activity to another weak point
Reinspect the full building envelope.
Do not keep sealing random interior holes without understanding where mice are entering from outside.
What If Mice Chew Through the Repair?
A failed repair may indicate:
- material that is too soft
- inadequate backing
- poor attachment
- an active high-pressure route
- unresolved food or shelter nearby
Upgrade the repair to a more durable construction detail rather than repeatedly adding more soft filler.
How to Prioritize Several Mouse Holes
When there are many gaps, use this order:
- gaps with fresh mouse evidence
- gaps connected to active rooms
- obvious exterior-to-interior routes
- larger unused defects
- small cosmetic defects
This keeps effort focused on the openings most likely to matter.
How Long Should You Monitor After Sealing?
Continue checking for fresh evidence after the repair.
Watch for:
- droppings
- gnawing
- tracks
- trap activity
- sightings
- scratching
The exact monitoring period depends on how active the problem was.
What matters is that fresh signs stop and the repair remains intact.
When to Call a Professional
Professional help may make sense when:
- you cannot identify the active entry point
- mice remain active after obvious repairs
- several entry routes are involved
- the repair requires roof access
- electrical wiring is damaged
- plumbing is leaking
- HVAC equipment is involved
- masonry or structural damage is present
- crawl-space access is unsafe
- the opening is part of a complex building system
A pest-control professional may help locate the active route.
A qualified trade may be needed to complete the repair safely.
See Mouse Exterminator: What to Expect & When to Call One.
How to Seal Holes to Keep Mice Out: The Bottom Line
To seal mouse holes effectively:
- inspect before repairing
- treat openings around 1/4 inch and larger as potentially mouse-accessible
- prioritize gaps with fresh evidence
- coordinate trapping with exclusion if mice are active indoors
- choose materials based on the surface and opening
- use durable backing where soft filler alone is not enough
- repair weatherstripping and screens instead of blocking moving or ventilating systems
- preserve drainage, exhaust, airflow, utilities, and service access
- monitor the repair for fresh activity
The best mouse-proof repair is not the one with the most filler.
It is the repair that closes the actual route, resists chewing, fits the building material, and does not interfere with the house.
Continue with our mouse entry points guide, mouse-proofing checklist, how small a hole can a mouse fit through guide, rodent exclusion guide, signs of mice guide, or how to get rid of mice.
For the broader overview, return to [Rats & Mice in the Home](/).