Mouse-Proofing a House: Complete Checklist
Mouse-proofing a house is more than filling one visible hole. A reliable prevention plan combines inspection, exclusion, food control, water control, clutter reduction, trapping when mice are already active, cleanup, and ongoing monitoring.
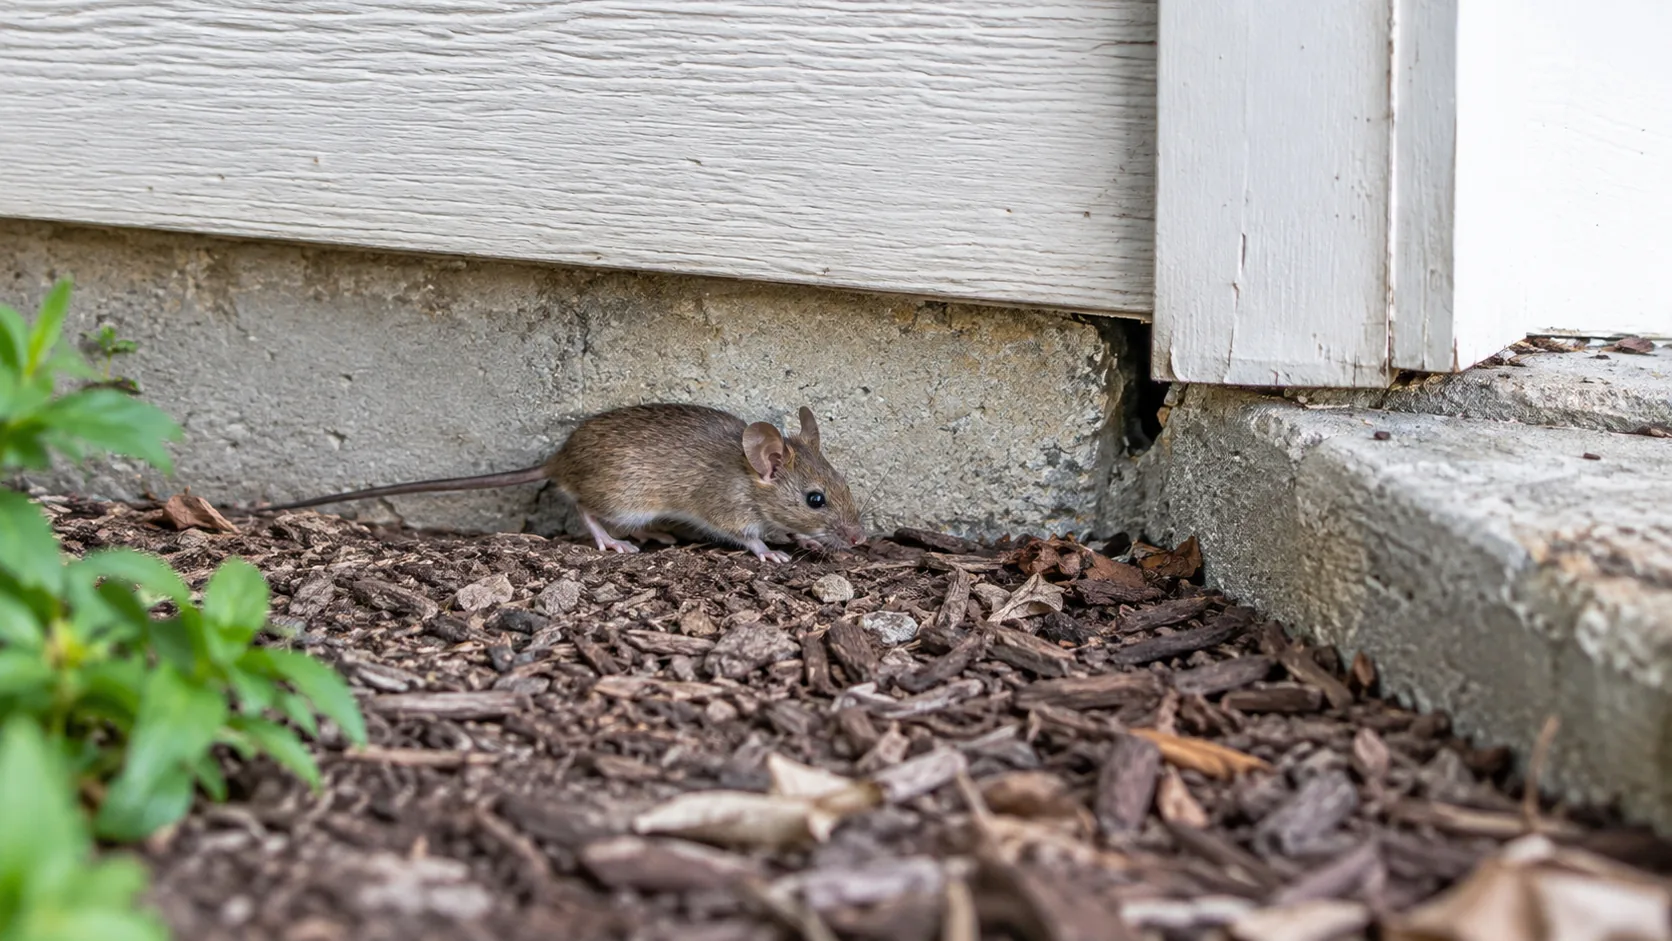
Mouse-proofing a house is more than filling one visible hole.
A reliable prevention plan combines:
- inspection
- exclusion
- food control
- water control
- clutter reduction
- trapping when mice are already active
- cleanup
- ongoing monitoring
The best time to mouse-proof a home is before activity becomes established.
But the same checklist is also useful after you have already found:
- mouse droppings
- gnaw marks
- scratching
- tracks
- a live mouse
- a nest
The key is to work in the right order.
If fresh mouse activity is already happening indoors, do not rush to seal every opening immediately.
First determine whether mice are still inside, use monitored traps where appropriate, and then complete exclusion without trapping animals in walls or other inaccessible spaces.
This checklist walks through the house from the exterior foundation to the roofline, then covers food, storage, indoor hotspots, cleanup, and follow-up monitoring.
Mouse-Proofing Checklist: Quick Version
Use this as the short version before working through the detailed sections.
Exterior
- inspect foundation and sill gaps
- inspect utility penetrations
- check exterior doors and thresholds
- inspect garage-door corners
- check crawl-space vents and access doors
- inspect basement windows and lower-level openings
- inspect siding and trim transitions
- inspect decks and porches that hide foundation areas
- inspect soffits, fascia, attic vents, and roofline gaps
Interior
- inspect under sinks
- inspect behind accessible appliances
- inspect lower cabinets and toe kicks
- inspect utility rooms
- inspect basement and crawl-space routes
- inspect attic framing and utility penetrations
- look for droppings, tracks, and gnawing near gaps
Food and Water
- store dry food in sturdy containers
- secure pet food and bird seed
- clean crumbs and grease
- use functioning trash lids
- fix avoidable leaks
- remove unnecessary standing water
Exclusion
- prioritize gaps with fresh mouse evidence
- treat openings around 1/4 inch and larger as potentially mouse-accessible
- use durable repair materials appropriate to the surface
- preserve ventilation, drainage, exhaust, and service access
- coordinate trapping with final sealing if mice are already indoors
Monitoring
- check traps
- watch for fresh droppings
- look for new gnawing
- reinspect repaired gaps
- repeat the exterior inspection after building work or severe weather
Step 1: Confirm Whether Mice Are Already Active
Before sealing, look for fresh evidence.
Useful signs include:
- mouse droppings
- small tracks
- fine gnaw marks
- nesting material
- repeated sightings
- fresh scratching in walls or ceilings
- food packaging damage
One mouse sign does not tell you how many mice are present.
See Signs of Mice: How to Tell If You Have Mice.
If activity is current, trapping and exclusion should be coordinated.
Step 2: Start With an Exterior Walkaround
Walk the entire exterior of the house during daylight.
Inspect from the ground upward.
A consistent order helps:
- foundation
- sill and lower-wall transitions
- utility penetrations
- doors
- garage
- crawl-space or basement openings
- siding and trim
- decks and porches
- soffits and fascia
- attic and roofline vents
Take notes or photos of suspect gaps.
Do not rely on memory if there are many openings.
See Mouse Entry Points: Where to Inspect Your Home for a deeper entry-point inspection guide.
Step 3: Treat Small Gaps Seriously
For practical mouse-proofing, treat openings around 1/4 inch — about 6 millimeters — and larger as potentially mouse-accessible.
That measurement is a rule of thumb, not an absolute guarantee.
Gap use depends on:
- the mouse’s size
- opening shape
- the narrowest usable dimension
- whether the material flexes
- whether the edge can be gnawed
See How Small a Hole Can a Mouse Fit Through?.
Step 4: Inspect the Foundation
Look for gaps where:
- concrete meets framing
- masonry meets siding
- additions meet the original structure
- porches or steps meet walls
- pipes and cables pass through
Prioritize gaps that also show:
- droppings
- gnawing
- tracks
- repeated mouse sightings
A cosmetic crack that does not enter a cavity is different from a true structural opening.
Step 5: Inspect the Sill and Lower Wall
The sill area can connect directly into:
- wall cavities
- basements
- crawl spaces
- floor systems
Check for:
- missing sealant
- damaged trim
- construction gaps
- irregular masonry
- gaps at corners
Do not cover drainage paths or building features you do not understand.
Step 6: Inspect Utility Penetrations
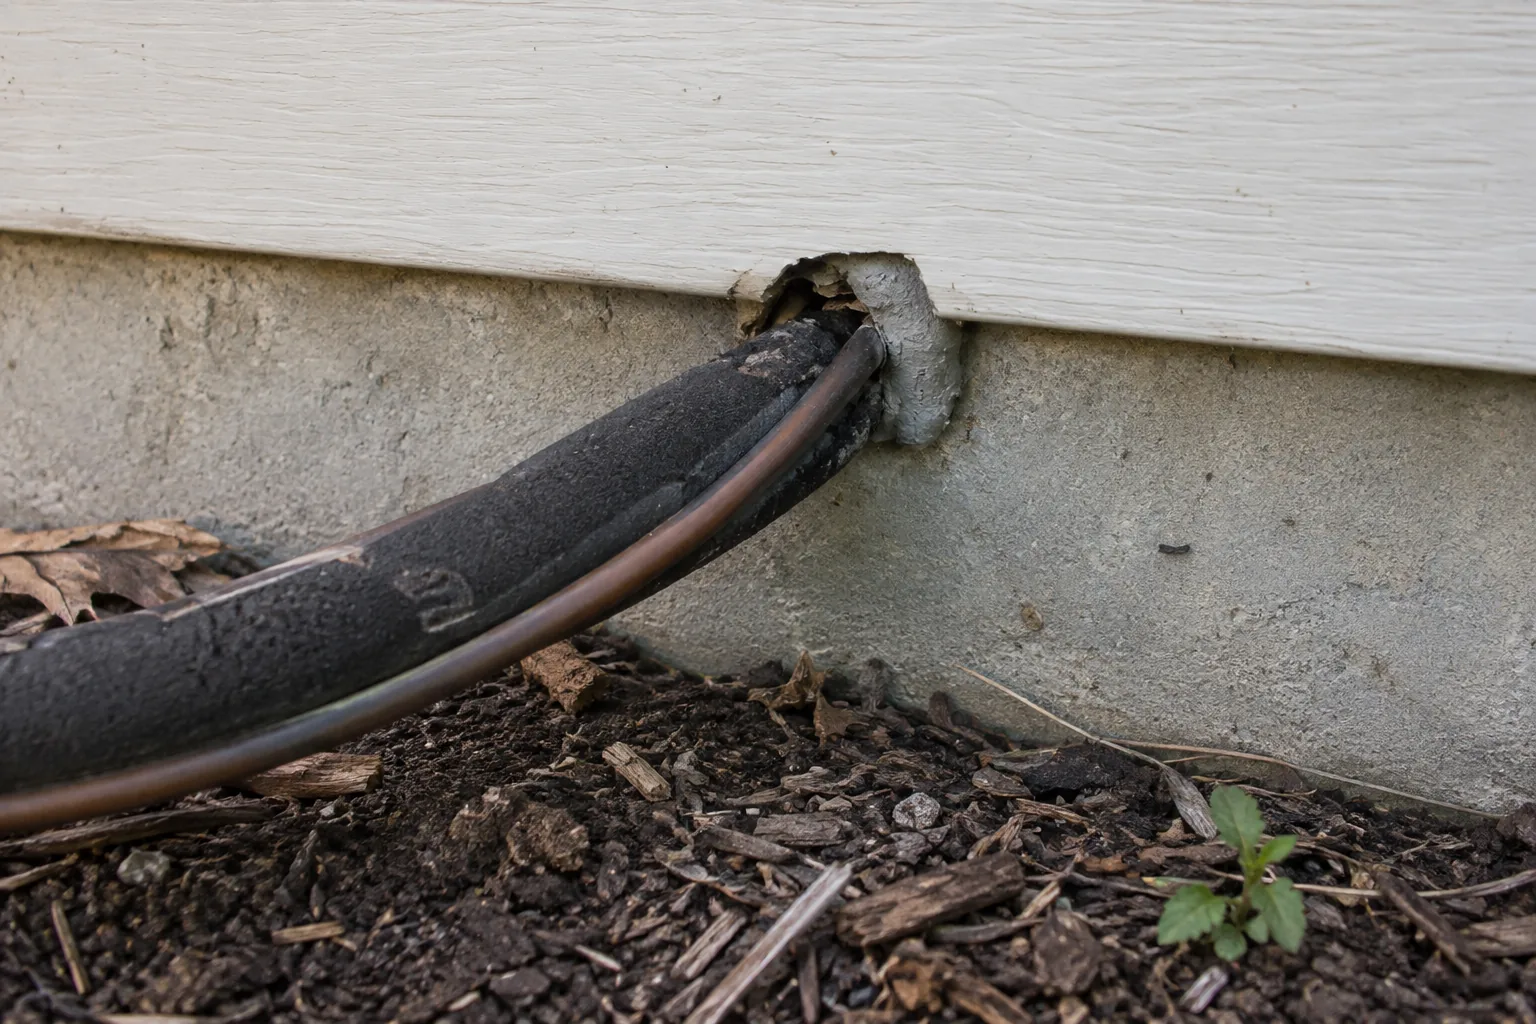
Check every place where a line enters the building.
Examples include:
- water pipes
- drain lines
- electrical conduit
- cable
- internet lines
- HVAC line sets
- condensate tubing
The mouse route is usually the extra structural space around the utility.
Do not:
- bend pipes
- crush insulation
- cover shutoffs
- block drainage
- work inside electrical equipment
unless qualified.
Step 7: Check Exterior Doors
Inspect:
- bottom sweeps
- lower corners
- thresholds
- weatherstripping
- damaged trim
A door may look tight in the center but still have an opening at one corner.
Repairs should preserve:
- smooth door operation
- egress
- fire-rating where applicable
Step 8: Inspect the Garage Door
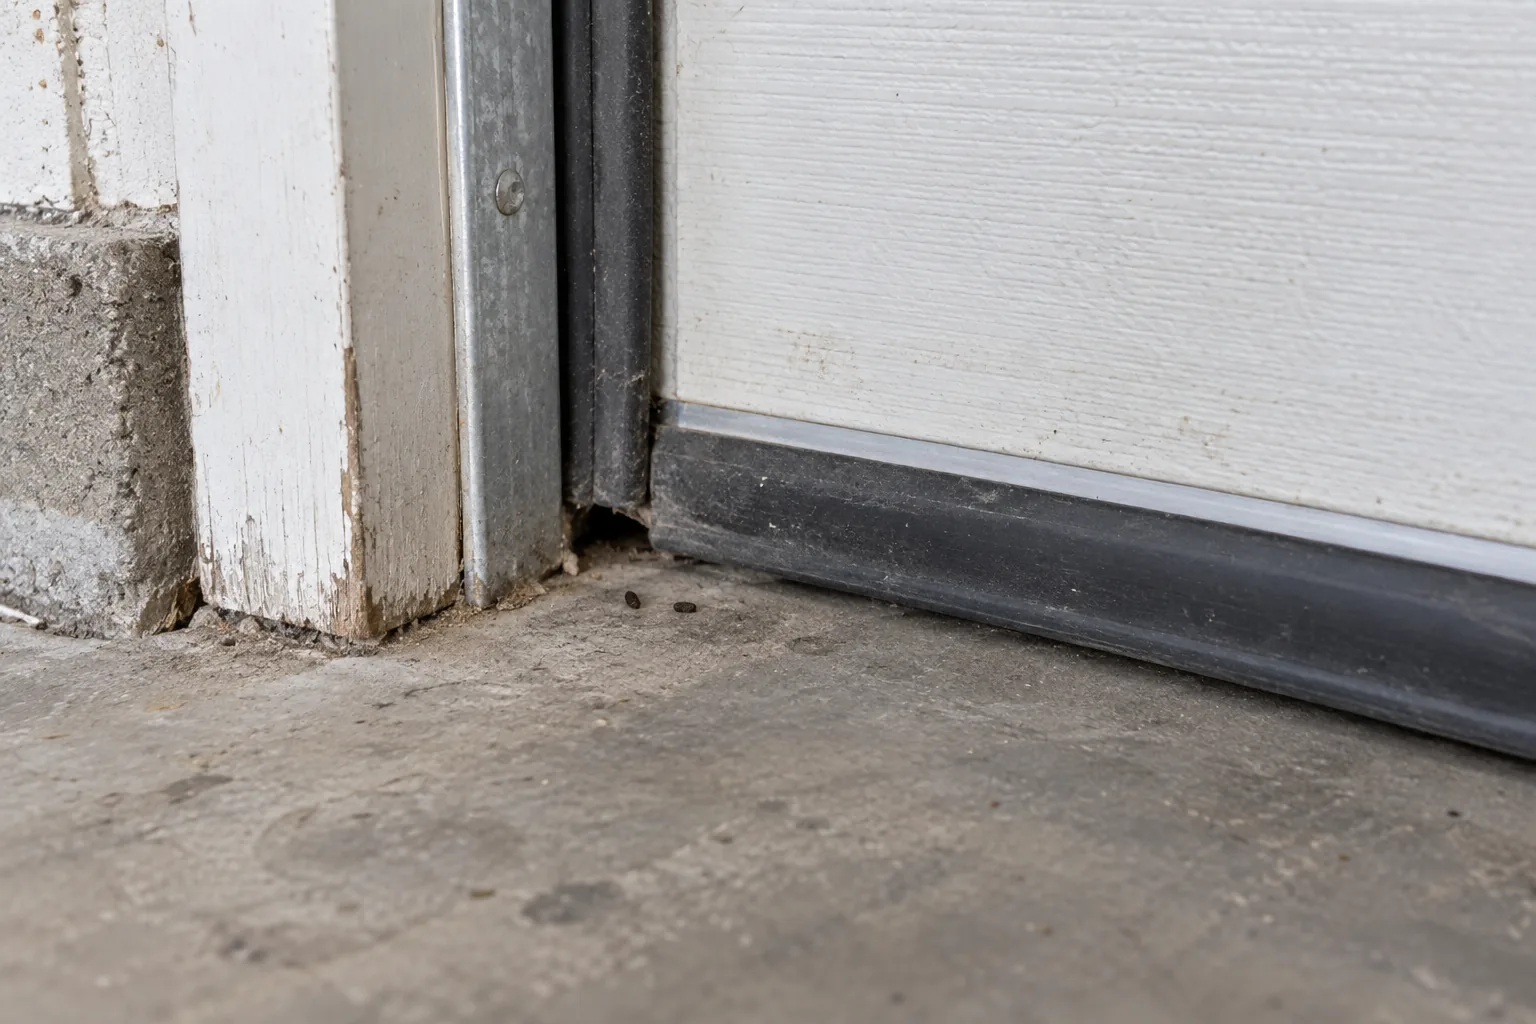
Garage-door lower corners are common mouse routes.
Check:
- bottom seal
- side seals
- jamb transitions
- concrete corners
- damaged weatherstripping
Look for:
- droppings
- tracks
- gnawing
- food storage nearby
See Mice in the Garage: Entry Points, Nests & Control.
Step 9: Mouse-Proof the Garage Interior
The garage can become a staging area before mice reach the house.
Reduce attractants such as:
- bird seed
- pet food
- grass seed
- stored snacks
- open garbage
- cardboard clutter
Store vulnerable food or seed in sturdy containers.
Inspect the wall shared with the house for:
- pipe gaps
- cable holes
- floor-wall gaps
Do not compromise a required fire-rated garage-to-house assembly.
Step 10: Inspect Crawl-Space Vents
Check crawl-space vents for:
- torn screening
- loose frames
- damaged corners
- perimeter gaps
Do not block the whole vent if it is part of the building’s ventilation design.
Repair the protective barrier while preserving airflow.
See Mice in the Crawl Space: Signs & Removal.
Step 11: Inspect Crawl-Space Access Doors
Check:
- bottom gaps
- damaged framing
- loose latches
- deteriorated edges
Do not enter a crawl space if there is:
- low clearance
- standing water
- damaged wiring
- heavy contamination
- unstable structure
- difficult exit access
Inspect from the perimeter when possible.
Step 12: Inspect Basement Windows and Doors
Lower-level openings are close to common mouse travel routes.
Check:
- window frames
- wells
- thresholds
- lower door corners
- deteriorated trim
- utility penetrations nearby
See Mice in the Basement: Why They’re There & What to Do.
Step 13: Inspect Siding and Trim
Look for:
- separated trim
- damaged corners
- missing material
- gaps around service lines
- lower siding defects
Do not assume every siding edge is an entry point.
Some siding systems intentionally allow movement, drainage, or ventilation.
Focus on gaps that connect to actual cavities.
Step 14: Do Not Block Weep or Drainage Openings
Some masonry and siding systems use intentional openings for:
- drainage
- ventilation
- moisture management
Do not fill them blindly.
A mouse-proofing repair should not create a moisture problem.
If a pest-resistant detail is needed, it must preserve the building function.
Step 15: Inspect Deck and Porch Edges
Decks and porches can hide:
- foundation gaps
- sill defects
- utility openings
- crawl-space damage
Inspect from safe perimeter positions.
Do not crawl under:
- unstable decks
- very low spaces
- wet areas
- heavily contaminated spaces
- electrically hazardous areas
See the entry-point guide for additional inspection logic.
Step 16: Inspect Soffits and Fascia
Mice can use upper-level routes too.
Look for:
- loose soffit panels
- damaged fascia
- gaps at roof-to-wall transitions
- damaged attic vent screens
Use a safe ground-level view.
Do not use an unstable ladder or climb onto a roof just to inspect a small gap.
Step 17: Inspect Attic Vents
Attic vents should provide airflow while excluding animals.
Check for:
- torn screens
- missing screening
- loose frames
- perimeter gaps
Do not block required attic ventilation.
See Mice in the Attic: Signs, Damage & Removal.
Step 18: Inspect the Kitchen
The kitchen is one of the highest-value indoor areas.
Check:
- under the sink
- behind the refrigerator
- beside the stove
- lower cabinets
- pantry edges
- pipe penetrations
- cabinet toe kicks
Look for:
- droppings
- gnawing
- tracks
- food damage
See Mice in the Kitchen: Why They’re There & What to Do.
Step 19: Inspect Behind the Refrigerator Safely
The space behind the refrigerator can hide:
- food debris
- utility gaps
- baseboard openings
- mouse droppings
Do not pull out a heavy refrigerator alone if it cannot be moved safely.
Do not strain:
- a power cord
- a water line
Do not open appliance service panels unless qualified.
See Mice Behind the Refrigerator: Why They Hide There.
Step 20: Inspect Under Sinks
Look around:
- drain pipes
- water lines
- dishwasher lines
An oversized opening through the cabinet back or wall can connect to a mouse route.
Do not interfere with:
- plumbing joints
- shutoff valves
- electrical components
The repair should close the building gap while preserving service access.
Step 21: Inspect Utility Rooms
Utility rooms may connect several building systems.
Look around:
- pipes
- cables
- HVAC lines
- floor penetrations
- wall penetrations
Do not place exclusion material inside active equipment.
Do not cover:
- service panels
- drains
- combustion air
- HVAC intake or exhaust
Step 22: Store Dry Food Properly
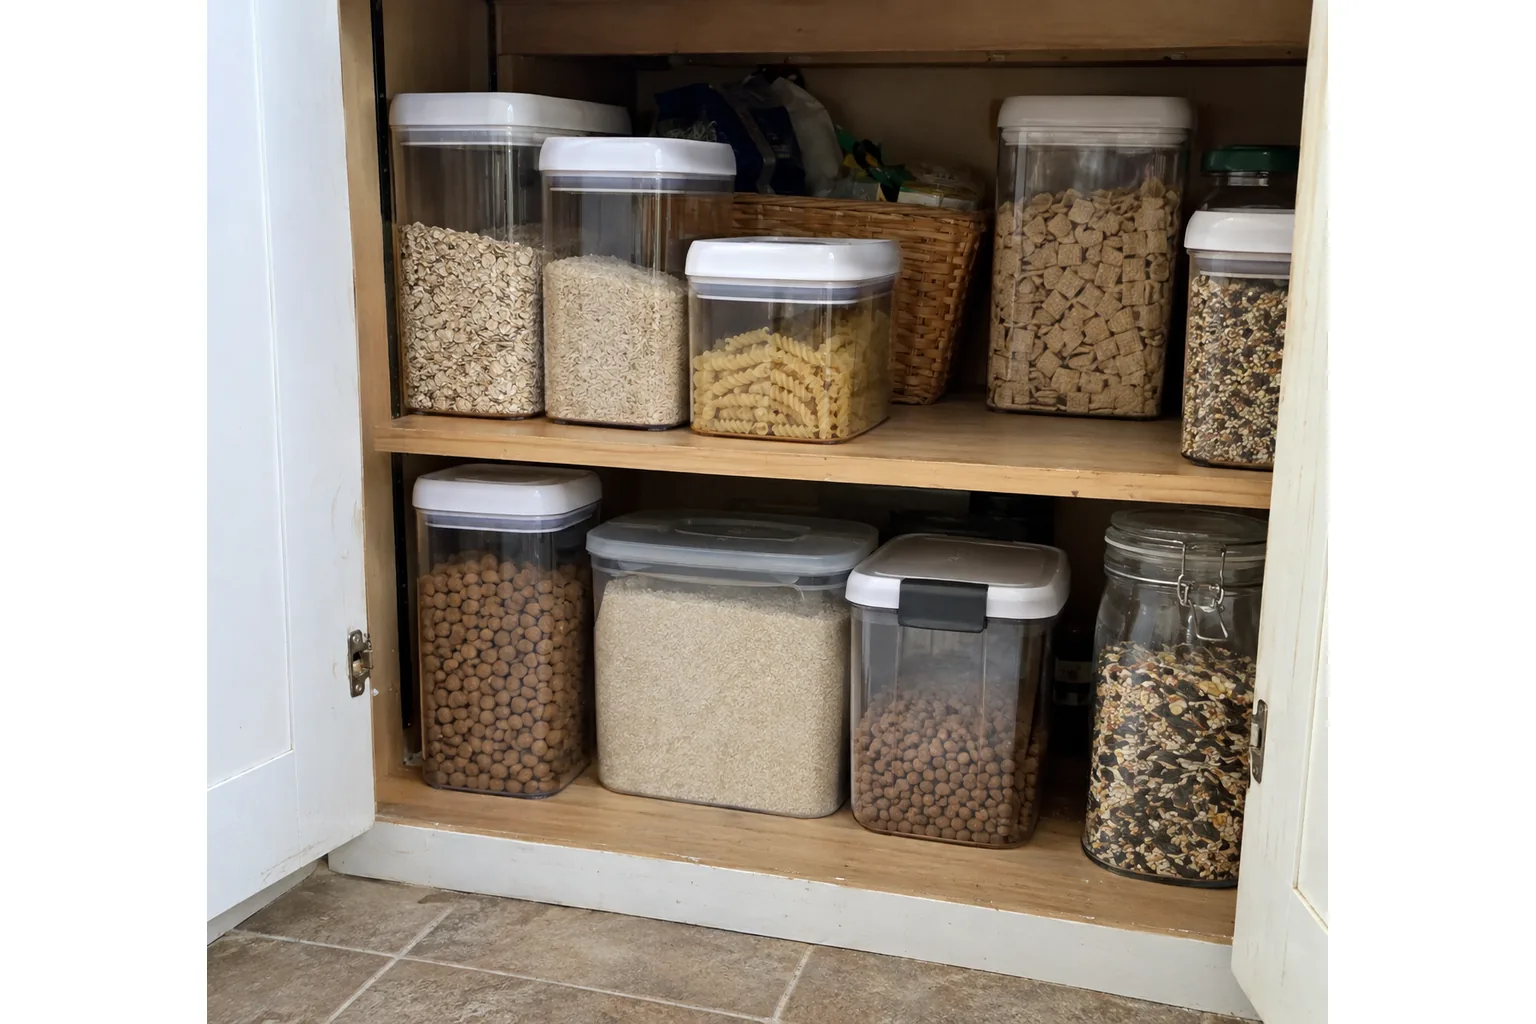
Mouse-proofing is not only about holes.
Food management reduces the reward for entering.
Protect:
- cereal
- rice
- pasta
- flour
- snacks
- baking supplies
- pet food
- bird seed
Use sturdy containers when practical.
Replace packages that have been contaminated or gnawed.
Step 23: Manage Pet Food
Pet food can support repeated mouse activity.
If practical:
- feed pets on a schedule
- remove leftovers
- clean spilled kibble
- store bulk food securely
Do not place mouse traps where pets can reach them.
Step 24: Manage Bird Seed and Animal Feed
Seed and feed can attract mice in:
- garages
- sheds
- porches
- storage rooms
Use sturdy storage containers.
Clean repeated spills.
This is especially important near garage or foundation entry routes.
Step 25: Control Garbage and Food Waste
Use functioning lids where practical.
Clean:
- spills
- grease
- food debris
- recycling residue
Do not allow food waste to accumulate near known mouse routes.
Step 26: Fix Avoidable Water Sources
Mice can use small water sources.
Check for:
- leaking faucets
- pipe leaks
- refrigerator water-line leaks
- standing water
- condensate problems
Do not interfere with necessary pet water.
The goal is to remove avoidable moisture, not create unsafe conditions.
Step 27: Reduce Clutter Near Walls
Mice prefer protected edges.
Reduce unnecessary clutter around:
- garage walls
- basement walls
- utility rooms
- storage areas
Pay particular attention to:
- cardboard
- paper
- fabric
- stacked bags
You do not need to empty the whole house.
Focus on areas connected to mouse activity.
Step 28: Use Mouse Traps When Activity Is Current
If fresh mouse evidence is present indoors, monitored trapping may be useful before final sealing.
Use mouse-sized traps along:
- wall edges
- cabinet edges
- appliance routes
- confirmed travel paths
Keep traps:
- stable
- accessible
- away from children and pets
See Mouse Traps: Types, Placement & How to Use Them.
Step 29: Do Not Use Loose Poison as “Mouse-Proofing”
Mouse-proofing should focus on:
- exclusion
- sanitation
- monitoring
- trapping where appropriate
Do not scatter loose rodenticide through:
- kitchens
- wall voids
- attics
- crawl spaces
- garages
Rodenticides must be used according to the product label and applicable placement requirements.
A poisoned mouse may die in an inaccessible cavity.
Step 30: Clean Mouse Droppings Safely
If you find a small accessible contaminated area:
- keep children and pets away
- wear suitable gloves
- avoid dry sweeping or vacuuming
- wet droppings and the nearby hard surface with an appropriate disinfecting solution
- allow the product’s required contact time
- collect the waste carefully
- bag it appropriately
- clean the nearby hard surface
- wash hands after removing gloves
Do not dry sweep or vacuum fresh mouse droppings or nesting material before wet cleanup.
See the cleanup section and rodent safety section.
Step 31: Prioritize Active Entry Points First
A useful repair priority is:
- opening with fresh mouse evidence
- opening connected to the active room
- opening with obvious structural access
- unused gaps that still create future risk
Fresh droppings, tracks, or gnawing near a gap make that route more important.
Do not spend all your time sealing harmless cosmetic cracks while an active utility gap remains open.
Step 32: Use Durable Repairs
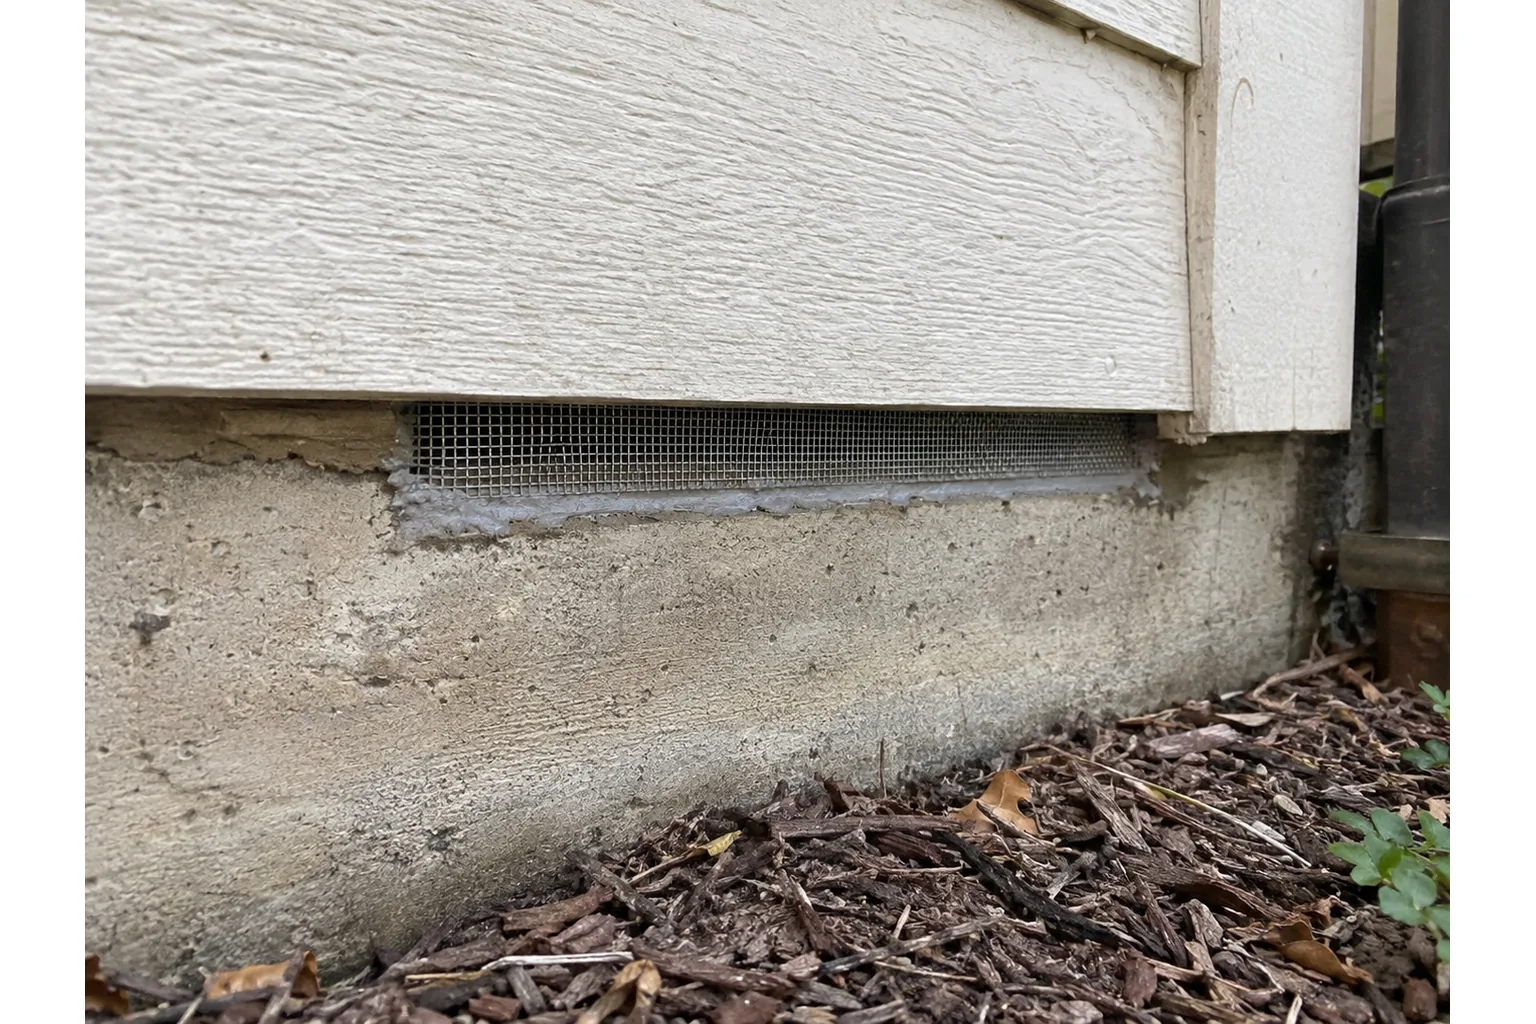
The correct repair depends on:
- surface
- gap shape
- weather exposure
- building function
Durable approaches may include:
- metal mesh
- flashing
- mortar
- rodent-resistant backing
- suitable sealant
- repaired weatherstripping
- repaired vent screening
Soft foam alone should not be treated as universally mouse-proof.
See Rodent Exclusion: How to Keep Rats & Mice Out for the broader exclusion strategy.
Step 33: Preserve Airflow and Drainage
Never mouse-proof a house by creating another building problem.
Do not block:
- dryer exhaust
- HVAC supply vents
- HVAC return grilles
- combustion air
- attic ventilation
- required crawl-space ventilation
- intentional weep holes
- drainage paths
The goal is to close unnecessary structural gaps, not functional openings.
Step 34: Preserve Utility and Service Access
Do not bury or block:
- electrical panels
- shutoff valves
- service fittings
- HVAC access panels
- cleanouts
- drain openings
A repair should remain serviceable.
If the opening is part of a system you do not understand, use the appropriate qualified trade.
Step 35: Do Not Seal Active Mice Inside
If mice are still indoors, final sealing may need to wait until:
- trapping activity declines
- fresh droppings stop
- sightings stop
- the active route is understood
Sealing the only exit while mice remain inside can cause them to:
- move into another room
- gnaw a new opening
- die in an inaccessible void
Coordinate removal and exclusion.
Step 36: Reinspect After Repairs
After mouse-proofing, revisit the repaired areas.
Look for:
- new gnawing
- displaced sealant
- damaged screening
- reopened weatherstripping
- new droppings nearby
A repair that repeatedly fails may need a more durable construction detail.
Step 37: Monitor Indoors
Continue checking for:
- fresh droppings
- new tracks
- trap activity
- gnawing
- scratching
- sightings
One quiet night is not proof the problem is solved.
Look for the absence of fresh evidence over time.
Step 38: Reinspect After Contractor Work
New gaps can appear after:
- plumbing work
- electrical work
- cable installation
- HVAC replacement
- siding work
- roof repair
- remodeling
Inspect new penetrations after the work is complete.
A mouse-proof house can become vulnerable again when a new service line is installed.
Step 39: Reinspect After Storms or Exterior Damage
Severe weather can loosen:
- soffits
- trim
- screens
- door seals
- siding
After major exterior damage, reinspect likely entry points.
Step 40: Make Mouse-Proofing Part of Seasonal Maintenance
A simple seasonal check can cover:
- foundation
- garage
- utility penetrations
- crawl-space vents
- doors
- soffits
- attic vents
Regular inspection is easier than discovering a new mouse route after signs appear indoors.
When to Call a Professional
Professional help may make sense when:
- the active entry point cannot be found
- mice continue after trapping and obvious repairs
- several areas of the house show activity
- the repair involves roofing
- electrical wiring is damaged
- plumbing is leaking
- HVAC components are involved
- masonry or structural repair is needed
- crawl-space access is unsafe
- heavy contamination is present
A pest-control professional may identify active mouse routes.
A qualified trade may be needed for the actual building repair.
See Mouse Exterminator: What to Expect & When to Call One.
Mouse-Proofing a House: Final Checklist
Before considering the job complete, confirm that you have:
- inspected the exterior foundation
- checked utility penetrations
- inspected doors and garage corners
- checked crawl-space and basement openings
- inspected siding and trim
- checked soffits, fascia, and attic vents
- inspected high-risk indoor areas
- secured food, pet food, and bird seed
- corrected avoidable water sources
- reduced clutter along active routes
- trapped active indoor mice where appropriate
- cleaned droppings safely
- repaired high-priority gaps
- preserved ventilation, drainage, exhaust, and service access
- monitored for fresh signs
- reinspected repairs
Mouse-proofing works best as a system.
The goal is not to make a house physically airtight.
It is to remove unnecessary mouse-sized openings, reduce the food and shelter that reward entry, and maintain the repairs over time.
Continue with our mouse entry points guide, how small a hole can a mouse fit through guide, how mice get into a house guide, rodent exclusion guide, signs of mice guide, mouse traps guide, or how to get rid of mice.
For the broader overview, return to [Rats & Mice in the Home](/).