Mouse Entry Points: Where to Inspect Your Home
Mice rarely enter a house through one obvious “mouse hole.” More often, they use a small construction gap that already exists around foundations, siding, doors, garage corners, utility lines, crawl-space vents, roof edges, or wall penetrations.
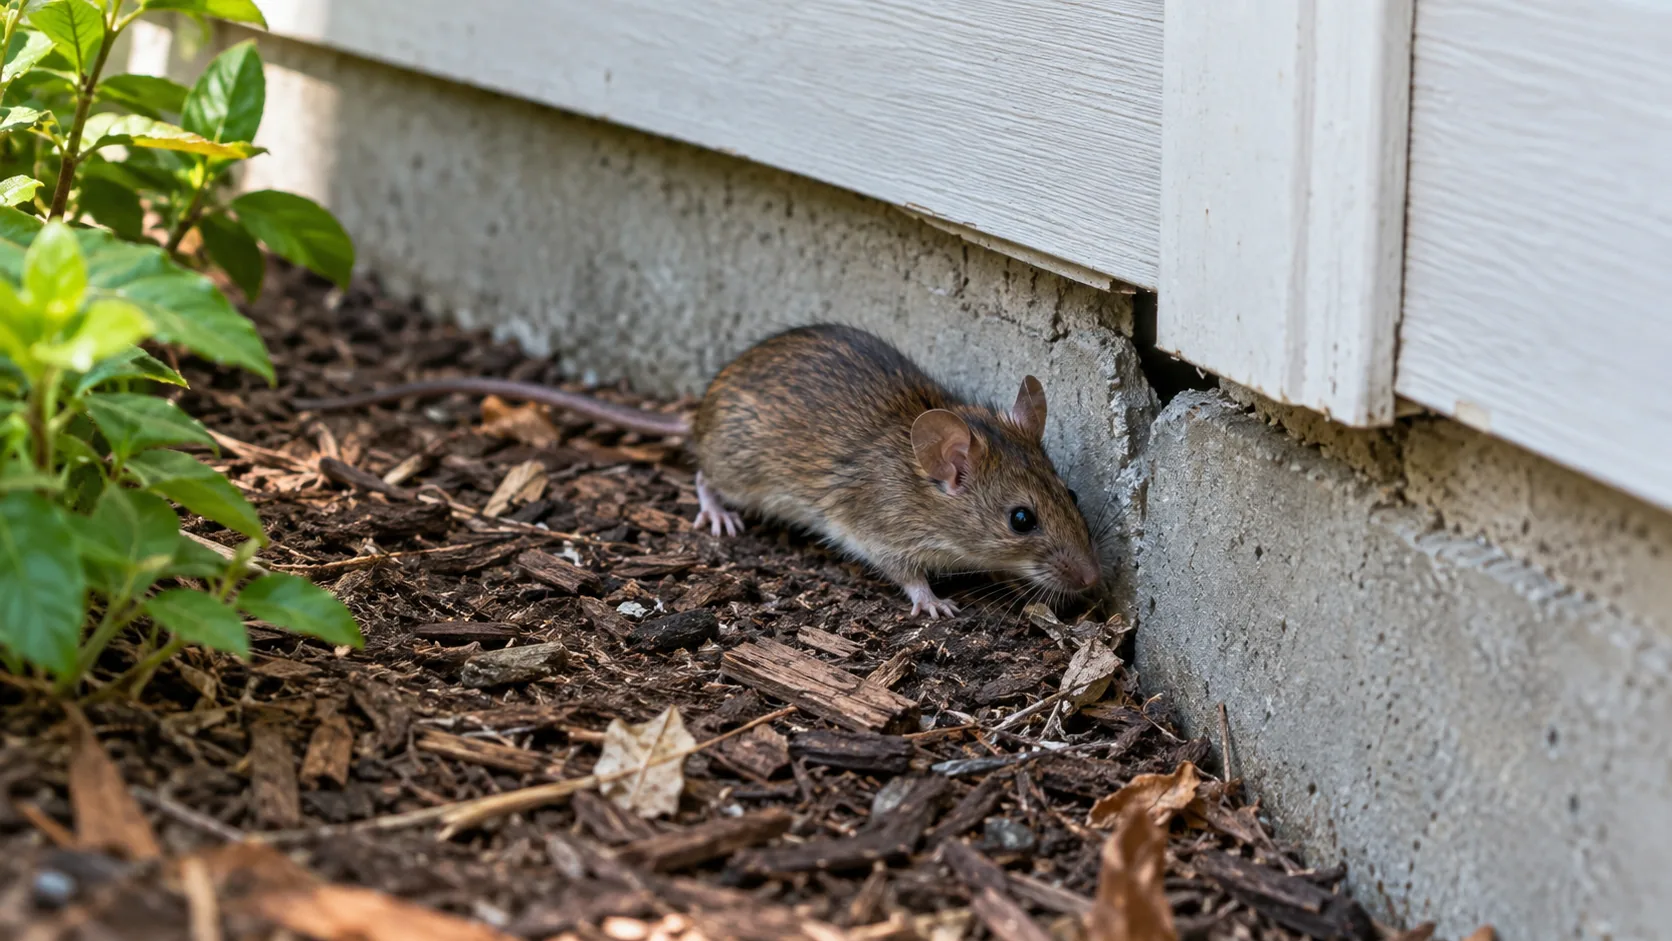
Mice rarely enter a house through one obvious “mouse hole.”
More often, they use a small construction gap that already exists around:
- foundations
- siding
- doors
- garage corners
- utility lines
- crawl-space vents
- roof edges
- wall penetrations
A house may have many gaps, but only some are active mouse routes.
That is why a useful inspection should do more than look for holes.
It should connect possible openings with evidence such as:
- mouse droppings
- tracks
- fine gnaw marks
- rub or dirt marks
- nesting material
- repeated sightings
- activity in nearby rooms
The goal is to identify which openings deserve priority, which can be repaired safely, and which require trapping or professional work before final sealing.
This guide walks through the main mouse entry points from the foundation to the roofline.
How Small an Opening Can a Mouse Use?
House mice can use surprisingly small openings.
As a practical inspection rule, pay attention to gaps around roughly 1/4 inch and larger, especially when the opening:
- leads into a wall or floor cavity
- follows a utility line
- sits along a foundation or sill
- shows droppings or gnawing
- connects to a known mouse activity area
Do not assume every small crack is active.
The surrounding evidence matters.
Where Should You Start Looking for Mouse Entry Points?
Start outside.
Walk the building perimeter slowly and inspect from low to high.
A useful order is:
- foundation
- sill and siding transitions
- utility penetrations
- exterior doors
- garage
- crawl-space or basement openings
- vents and exterior penetrations
- roofline and soffits
Then compare those areas with where mouse signs appear indoors.
See How Mice Get Into Your House for the broader route overview.
Mouse Entry Points at the Foundation
The foundation is one of the highest-value places to inspect.
Look for gaps where:
- concrete meets siding
- masonry meets wood framing
- additions meet the original structure
- steps or porches meet the house
- utility lines pass through the wall
Also inspect cracks or damaged areas that actually open into a cavity.
A surface crack that does not lead through the building is different from an open penetration.
Foundation-to-Sill Gaps
The sill area is where the lower wood framing meets the foundation.
Possible mouse routes include:
- missing sealant
- damaged trim
- gaps at corners
- irregular masonry
- deteriorated material
This area can lead directly into:
- wall cavities
- floor systems
- crawl spaces
- basements
Look for nearby mouse droppings or gnawing before assuming a gap is active.
Gaps Around Exterior Pipes
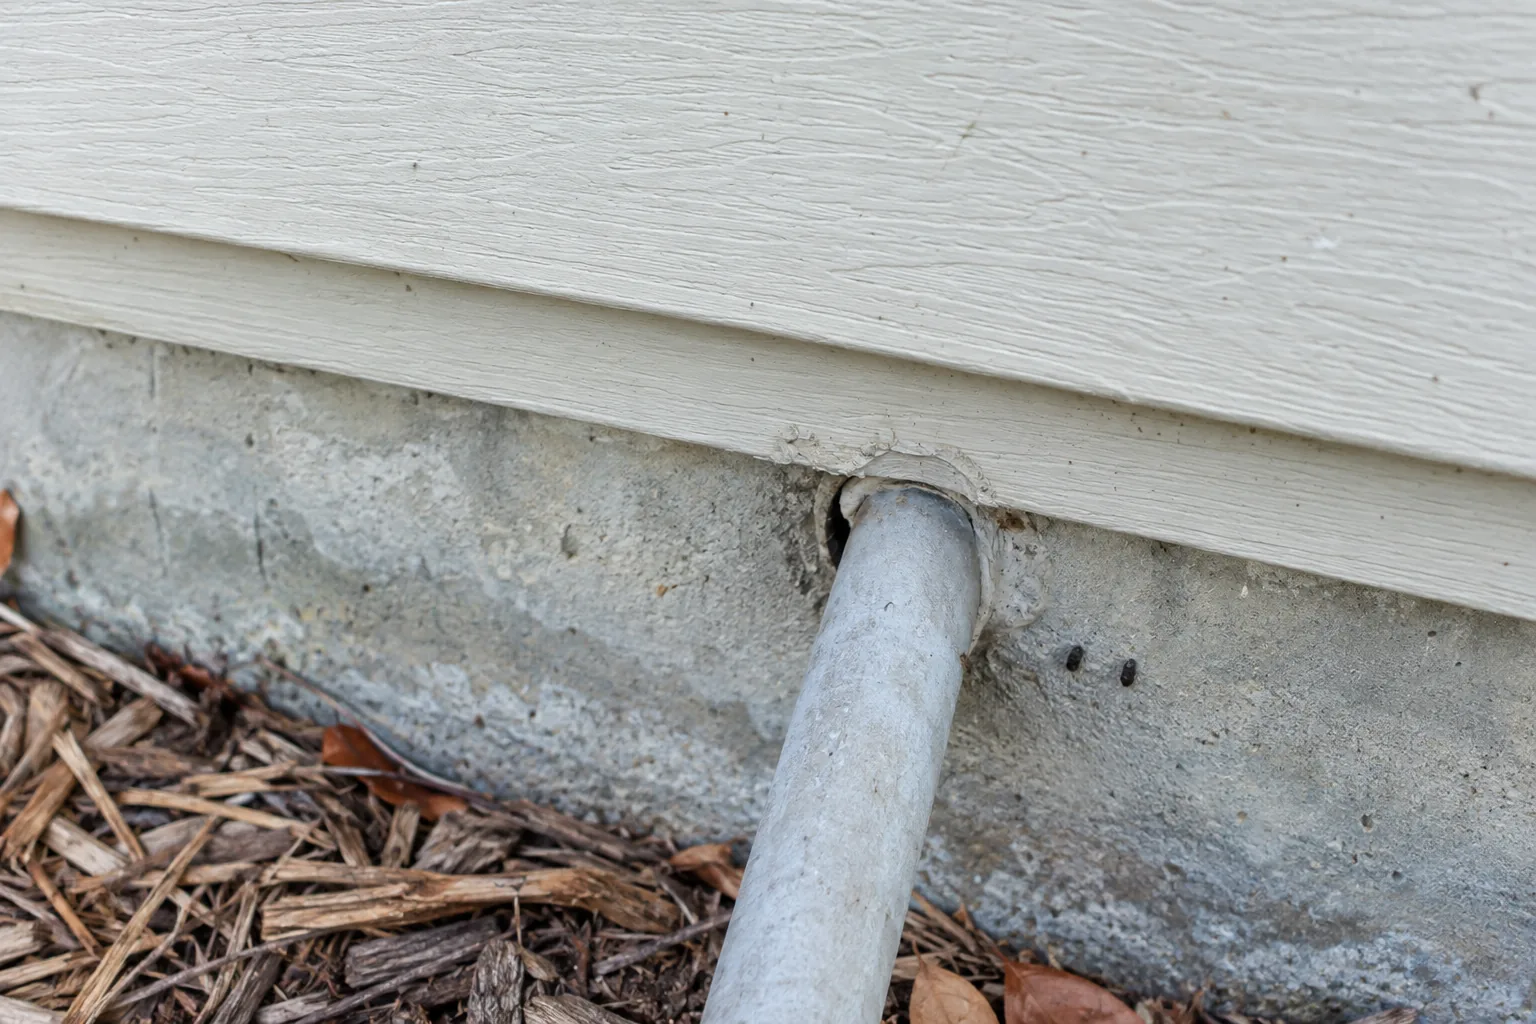
Pipes often pass through exterior walls or foundations.
Inspect around:
- water lines
- drain lines
- hose bibs
- condensate lines
- other plumbing penetrations
The opening around the pipe may be larger than necessary.
Do not:
- bend the pipe
- disturb plumbing joints
- block drainage
- pack material against components that need service
The repair should close the building gap without damaging the utility.
Gaps Around Electrical Conduit
Electrical penetrations can leave openings around:
- conduit
- service cables
- exterior boxes
- low-voltage wiring
Do not work inside electrical boxes or around exposed energized components unless qualified.
The mouse route is often the structural gap around the penetration, not the electrical system itself.
If wiring is damaged or exposed, have the electrical issue addressed appropriately.
Cable and Internet Line Penetrations
Small cable penetrations can become mouse routes when installers leave an oversized hole.
Inspect where:
- coaxial cable
- fiber
- telephone lines
- satellite wiring
enter the building.
A small cable does not require a large surrounding gap.
If the opening leads into a wall cavity, it may deserve repair.
HVAC Line-Set Openings
Air-conditioning and heat-pump line sets often pass through an exterior wall.
Inspect the opening around:
- refrigerant lines
- condensate tubing
- control wiring
Do not:
- crush insulation
- kink tubing
- cover service fittings
- interfere with drainage
The goal is to close excess structural space around the penetration while leaving the HVAC system functional and serviceable.
Dryer Vent Openings
Inspect the wall around the dryer vent hood.
Look for:
- gaps around the exterior penetration
- damaged trim
- loose mounting
- openings beside the duct
Do not block or reduce the dryer exhaust opening.
Do not add improvised mesh inside the airflow path where lint can accumulate.
Dryer exhaust must remain functional and safe.
Other Exterior Exhaust Vents
Bathroom or kitchen exhaust penetrations can also create gaps around their housings.
Inspect the perimeter of the vent.
Do not block the intended airflow.
The concern is the structural space around the vent housing, not the functioning exhaust opening.
Mouse Entry Points Around Exterior Doors
Doors can provide mouse access when gaps develop around:
- thresholds
- lower corners
- weatherstripping
- frames
- damaged trim
Pay special attention to the lower corners.
A door may look closed but still have an opening near the jamb.
How to Check a Door Sweep
Inspect the bottom of the door when it is closed.
Look for:
- visible daylight
- worn sweep material
- torn weatherstripping
- uneven floor contact
- large corner gaps
A door sweep should reduce the gap without preventing the door from operating properly.
Do not alter required fire-rated or egress doors in a way that affects their function.
Garage-Door Mouse Entry Points
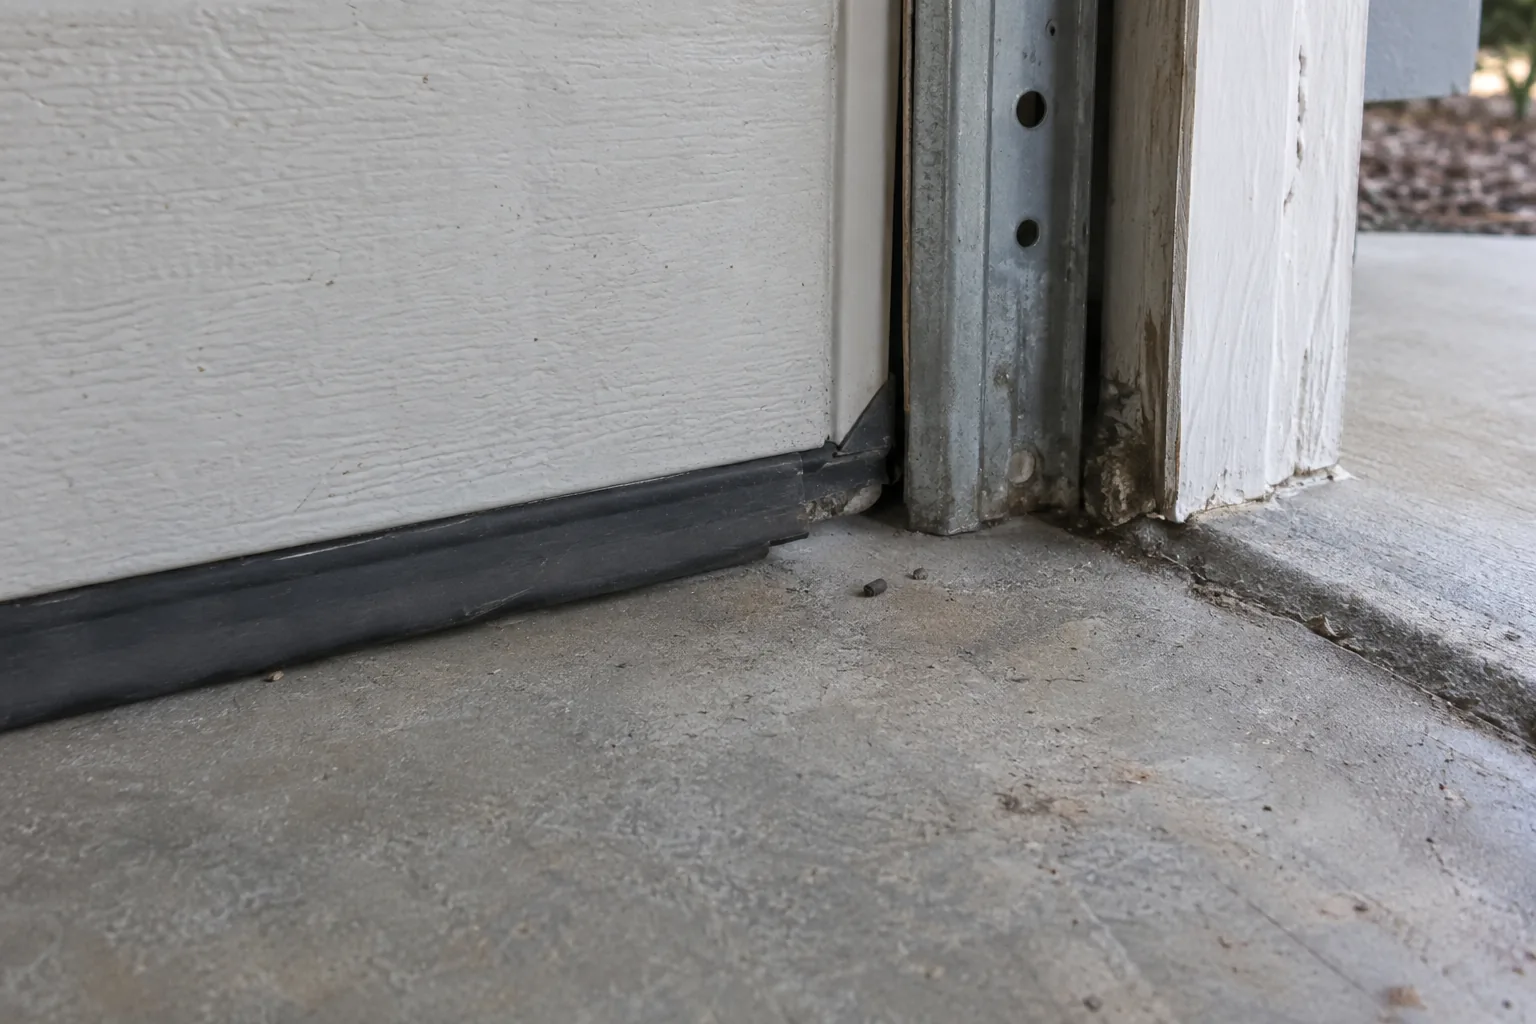
Garage doors are common mouse routes because the lower corners are difficult to seal perfectly.
Inspect:
- bottom seal
- side seals
- lower track area
- concrete-to-frame corners
- damaged weatherstripping
Look for:
- droppings
- gnawing
- tracks in dust
- food storage nearby
See Mice in the Garage: Entry Points, Nests & Control.
Attached Garage to House Entry Points
Even if mice enter only the garage first, they may continue into the house.
Inspect the shared wall for:
- utility penetrations
- pipe gaps
- cable holes
- damaged trim
- wall-floor openings
Do not alter fire-rated garage-to-house assemblies without understanding the building requirements.
Permanent repairs may need to preserve fire separation.
Mouse Entry Points Around Windows
Windows can develop gaps around:
- trim
- frames
- damaged screens
- basement window wells
A damaged screen alone may not matter if the window remains closed and sealed.
Focus on openings that actually connect indoors.
Basement Window Entry Points
Lower-level windows deserve extra attention because they are close to ground-level mouse routes.
Inspect:
- frame corners
- deteriorated caulk
- damaged trim
- window-well edges
- utility penetrations nearby
See Mice in the Basement: Why They’re There & What to Do.
Crawl-Space Vents
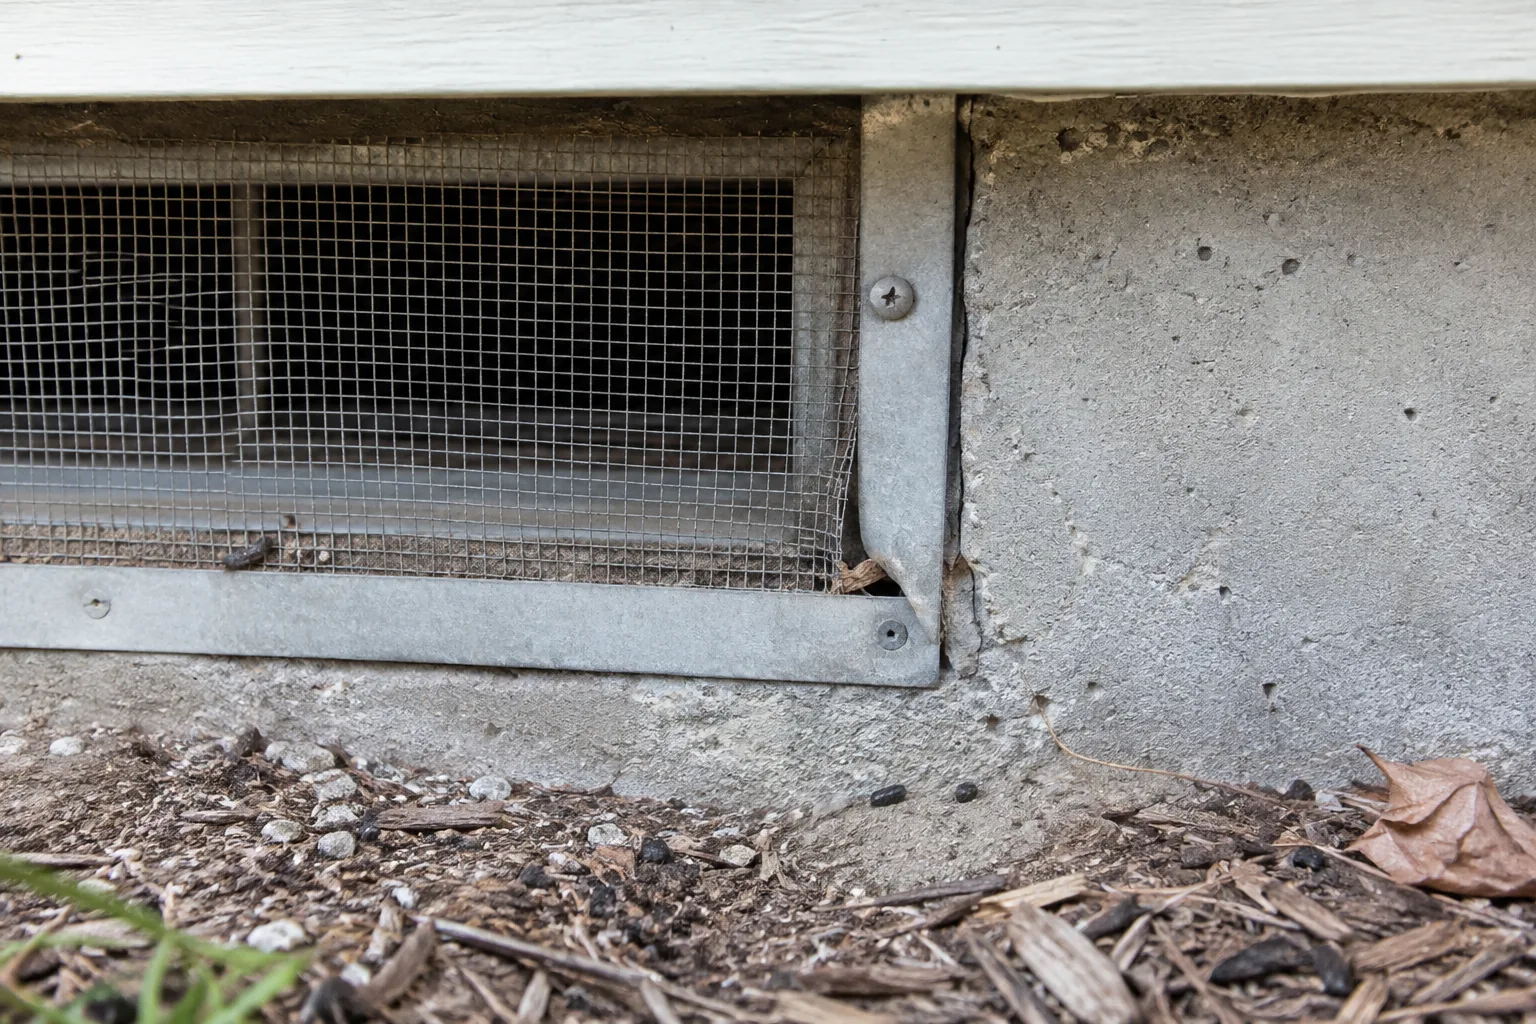
Crawl-space vents can become entry points when:
- screening is missing
- mesh is damaged
- the vent frame is loose
- gaps exist around the vent
Do not simply block the entire vent.
Ventilation requirements depend on the building design and moisture-control strategy.
Repair the protective screening or structural gap without defeating the intended ventilation system.
Crawl-Space Access Doors
Inspect access doors for:
- bottom gaps
- damaged frames
- failed latches
- deteriorated edges
A mouse may use the access opening and then travel into:
- floor cavities
- walls
- plumbing routes
See Mice in the Crawl Space: Signs & Removal.
Gaps Around Siding
Siding may hide openings where:
- panels meet trim
- corners are damaged
- utility lines pass through
- the lower edge meets the foundation
Do not assume every open-looking siding edge leads indoors.
Inspect whether the gap connects to:
- sheathing damage
- framing
- a wall cavity
Brick and Masonry Gaps
Masonry buildings can still have mouse routes around:
- utility penetrations
- transitions to wood framing
- damaged mortar
- openings at additions
Do not block intentional drainage or weep features without understanding their purpose.
If a masonry repair could affect drainage, flashing, or structure, use an appropriate repair method.
Weep Holes and Drainage Openings
Some wall systems intentionally include openings for drainage and ventilation.
Do not permanently plug a designed weep or drainage opening just because it looks mouse-sized.
If pest protection is needed, the solution must preserve the opening’s building function.
Gaps Around Decks and Porches
Decks and porches can hide foundation openings.
Inspect where:
- ledger areas meet walls
- steps meet the foundation
- posts or trim obscure lower walls
- utilities pass behind the structure
Do not dismantle structural deck components simply to search for mice.
If access is limited, inspect from safe perimeter positions.
Mouse Entry Points Near the Roofline
Mice can also enter above ground level.
Inspect:
- soffits
- fascia
- roof-to-wall intersections
- gable vents
- damaged trim
- openings where utilities enter upper walls
Upper entry points can lead directly into an attic or wall cavity.
See Mice in the Attic: Signs, Damage & Removal.
Soffit Gaps
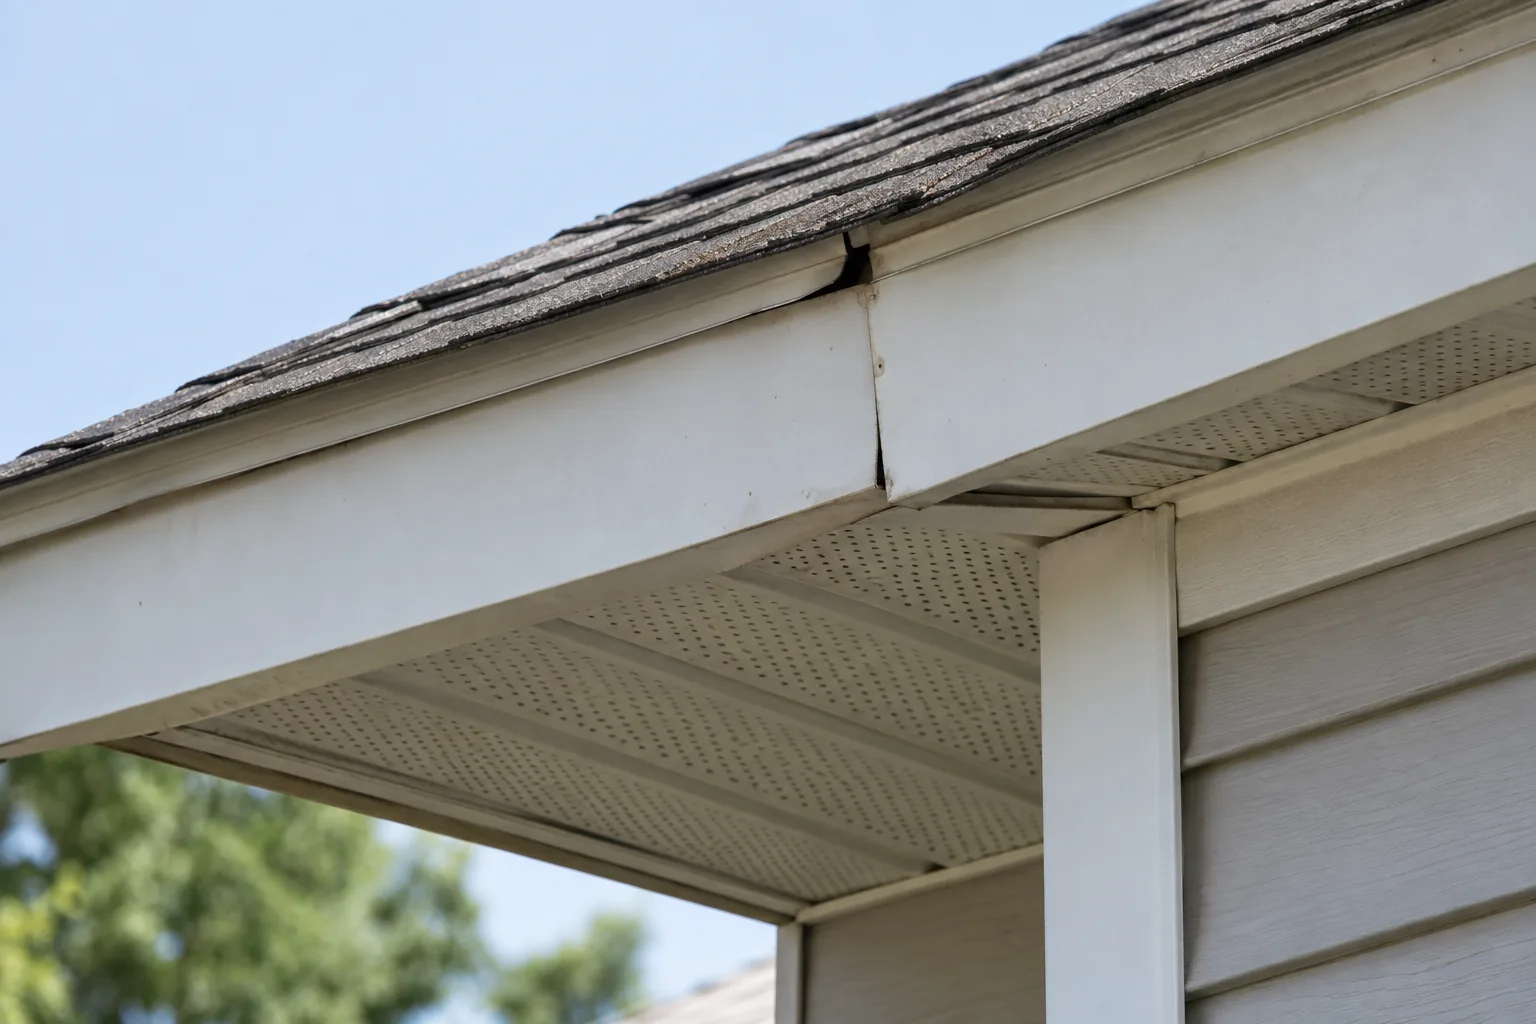
Soffits may develop openings because of:
- loose panels
- damaged vents
- deteriorated trim
- construction gaps
Do not work from an unsafe ladder or roof position.
If the inspection requires difficult access, binoculars, a safe ground-level view, or professional help may be more appropriate.
Fascia and Roof-Edge Gaps
Inspect roof edges for:
- damaged trim
- missing material
- gaps around transitions
A visible roofline opening becomes more important when attic mouse evidence appears nearby.
Do not perform roofing repairs from an unsafe position.
Gable and Attic Vents
Attic vents should allow airflow while preventing animal entry.
Inspect for:
- missing screens
- torn screens
- loose vent frames
Do not block required attic ventilation.
Repair the protective barrier rather than sealing the vent shut.
Chimney and Roof Penetrations
Roof penetrations around:
- vents
- pipes
- flashing
- chimneys
can create building gaps.
These areas involve:
- roofing
- water intrusion
- flashing
- height hazards
Use a qualified professional when inspection or repair cannot be done safely from the ground.
Can Mice Enter Through Air Vents?
Sometimes a mouse problem appears near an air register or duct route.
The active opening is often around:
- a duct boot
- wall framing
- a utility chase
rather than through the intended HVAC opening.
Do not block active supply or return airflow.
See Mice in Air Vents: How They Get There & What to Do.
Mouse Entry Points Behind Kitchen Cabinets
Interior inspection can help connect an exterior route to the room where activity appears.
Check accessible cabinet areas for:
- pipe gaps
- wall-floor openings
- toe-kick gaps
- droppings
Do not dismantle built-in cabinetry unless needed and authorized.
Mouse Entry Points Behind the Refrigerator
The refrigerator can hide:
- utility gaps
- baseboard openings
- wall-floor gaps
Inspect safely.
Do not move a heavy refrigerator alone or interfere with electrical or water connections.
See Mice Behind the Refrigerator: Why They Hide There.
Mouse Entry Points Under the Sink
Sink cabinets often reveal oversized holes around:
- drain pipes
- water lines
- dishwasher lines
These openings can connect directly into a wall cavity.
Do not pack material around:
- shutoff valves
- moving plumbing
- leaking joints
without addressing the actual plumbing condition.
Mouse Entry Points Around Radiator or Heating Pipes
In some homes and apartments, heating pipes pass through floors or walls.
Mice may use the structural space around the pipe.
Do not modify:
- heating equipment
- hot surfaces
- fire stopping
- shared building systems
without the appropriate knowledge or authorization.
How to Tell Whether an Entry Point Is Active
A gap is more likely to be active when it has nearby:
- fresh droppings
- fine gnaw marks
- tracks
- rub or dirt marks
- disturbed insulation
- repeated sightings
The strongest evidence is usually a combination of signs.
A clean opening with no nearby mouse activity may still deserve repair, but it may not be the current route.
Mouse Droppings Near an Entry Point
Droppings can help prioritize inspection.
Look for them along:
- walls
- foundation edges
- cabinets
- garage corners
- utility routes
Do not use the number of droppings to estimate how many mice are present.
See Mouse Droppings: What They Look Like & What They Mean.
Mouse Gnawing Around Entry Points
Mice may enlarge or maintain soft openings by gnawing.
Look for fine gnaw marks on:
- wood
- plastic
- soft sealant
- foam
- cabinet material
See Mouse Gnaw Marks: How to Identify Rodent Damage.
Mouse Tracks Near Entry Points
Dust or soft soil may preserve tracks near:
- garages
- basements
- crawl spaces
- foundation edges
Tracks are more useful when they align with a visible opening.
See Mouse Tracks: What They Look Like & Where to Find Them.
Should You Seal Every Gap You Find?
Eventually, many unnecessary openings should be repaired.
But do not blindly seal every possible route during active indoor mouse activity.
If mice are already inside and you close the only route they are using, they may:
- move deeper into the structure
- enter another room
- gnaw a new exit
- die in an inaccessible void
Coordinate trapping or removal with exclusion.
See Rodent Exclusion: How to Keep Rats & Mice Out.
Which Entry Points Should Be Prioritized First?
Start with openings that have both:
- a plausible structural path
- fresh mouse evidence nearby
High-priority examples include:
- a garage-door corner with droppings
- a pipe gap beside kitchen activity
- a damaged crawl-space vent with tracks
- a foundation opening near repeated sightings
- a roofline gap with attic droppings
This is more useful than sealing random cosmetic cracks.
What Materials Are Used to Repair Mouse Entry Points?
The right material depends on the opening and building surface.
Common durable approaches may involve:
- metal mesh
- flashing
- mortar
- rodent-resistant backing
- suitable exterior sealant
- repaired weatherstripping
- repaired screening
Do not treat soft foam alone as universally mouse-proof.
See the rodent exclusion guide for the full repair strategy.
What Should You Not Seal?
Do not block or damage:
- dryer exhaust
- HVAC supply or return airflow
- combustion air
- required attic or crawl-space ventilation
- intentional drainage or weep openings
- plumbing drainage
- electrical equipment
- service access
- moving door hardware
A good mouse repair preserves the building system’s original function.
Should You Use Traps Before Sealing?
When fresh indoor mouse activity is present, monitored trapping can help determine whether mice remain inside.
Place mouse-sized traps on accessible routes.
See Mouse Traps: Types, Placement & How to Use Them.
Do not place traps where they:
- cannot be checked
- are buried inside inaccessible cavities
- interfere with electrical or HVAC equipment
How to Inspect Without Missing Small Entry Points
Use a consistent method.
Exterior
Walk every wall.
Corners
Inspect changes in materials and building geometry.
Utilities
Check every pipe, cable, conduit, and line-set penetration.
Doors
Check lower corners and thresholds.
Garage
Inspect door seals and the shared wall.
Lower Level
Inspect basement and crawl-space openings.
Roofline
Look at soffits, fascia, vents, and upper-wall transitions.
Take notes or photos so you do not inspect the same areas repeatedly.
Should You Inspect at Night?
You do not need to inspect outside at night.
Daylight usually makes structural gaps easier to see.
If mouse activity is mostly nocturnal, trap monitoring and fresh droppings may be more useful than trying to watch mice enter.
When to Call a Professional
Professional inspection or repair may make sense when:
- the active entry point cannot be found
- mouse activity continues after obvious gaps are addressed
- the opening is on a roof or high wall
- electrical wiring is damaged
- plumbing is leaking
- HVAC components are involved
- masonry or structural repair is needed
- crawl-space access is unsafe
- several entry routes appear active
A pest-control professional may help identify active mouse routes.
A qualified trade may be needed for the actual building repair.
See Mouse Exterminator: What to Expect & When to Call One.
Mouse Entry Points: The Bottom Line
Mouse entry points can occur anywhere the exterior building envelope has a small opening.
The most important places to inspect are:
- foundation edges
- sill transitions
- utility penetrations
- doors
- garage corners
- crawl-space vents
- basement openings
- siding and trim
- roofline and soffits
Do not treat every gap as equally important.
Prioritize openings that connect to fresh mouse evidence.
If mice are already active indoors:
- document the likely routes
- use monitored trapping where appropriate
- avoid sealing mice inside
- repair entry points with durable materials
- preserve ventilation, drainage, utilities, and service access
- monitor for fresh signs after repairs
The best inspection connects outdoor entry points with indoor evidence.
Continue with our how mice get into a house guide, rodent exclusion guide, signs of mice guide, mouse droppings guide, mouse tracks guide, mice in the garage guide, mice in the crawl space guide, mice in the attic guide, or how to get rid of mice.
For the broader overview, return to [Rats & Mice in the Home](/).